

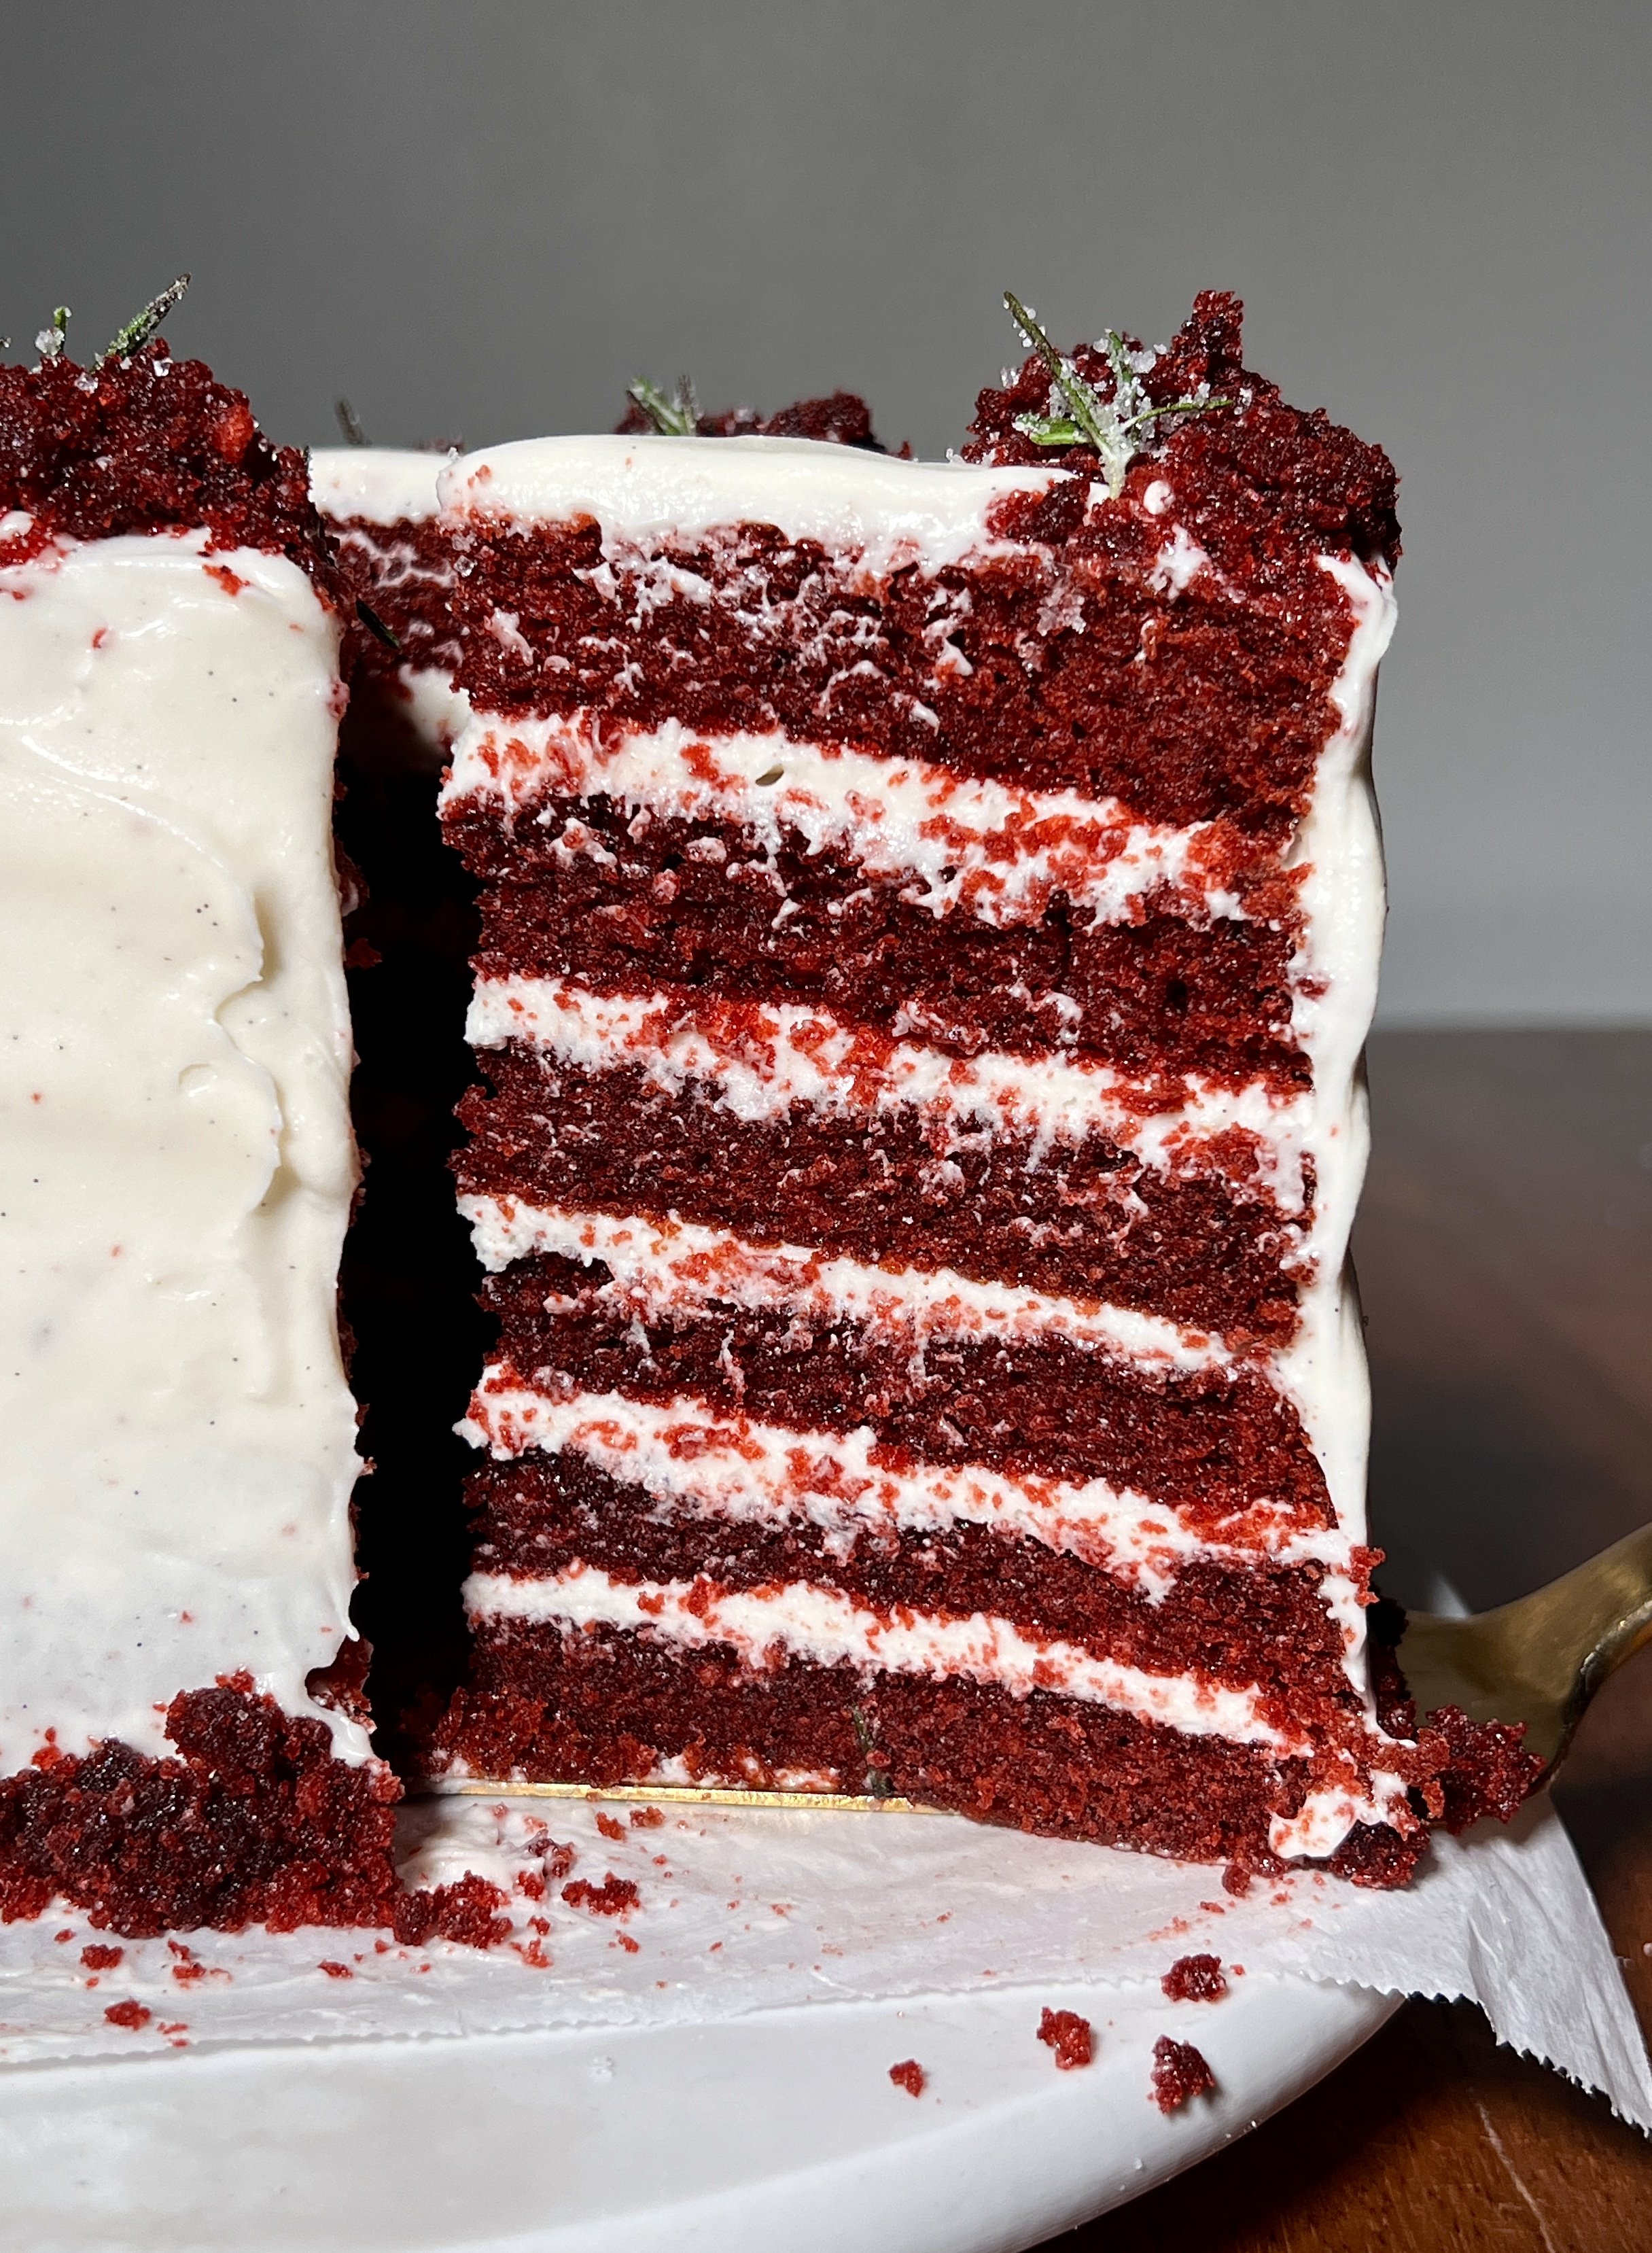
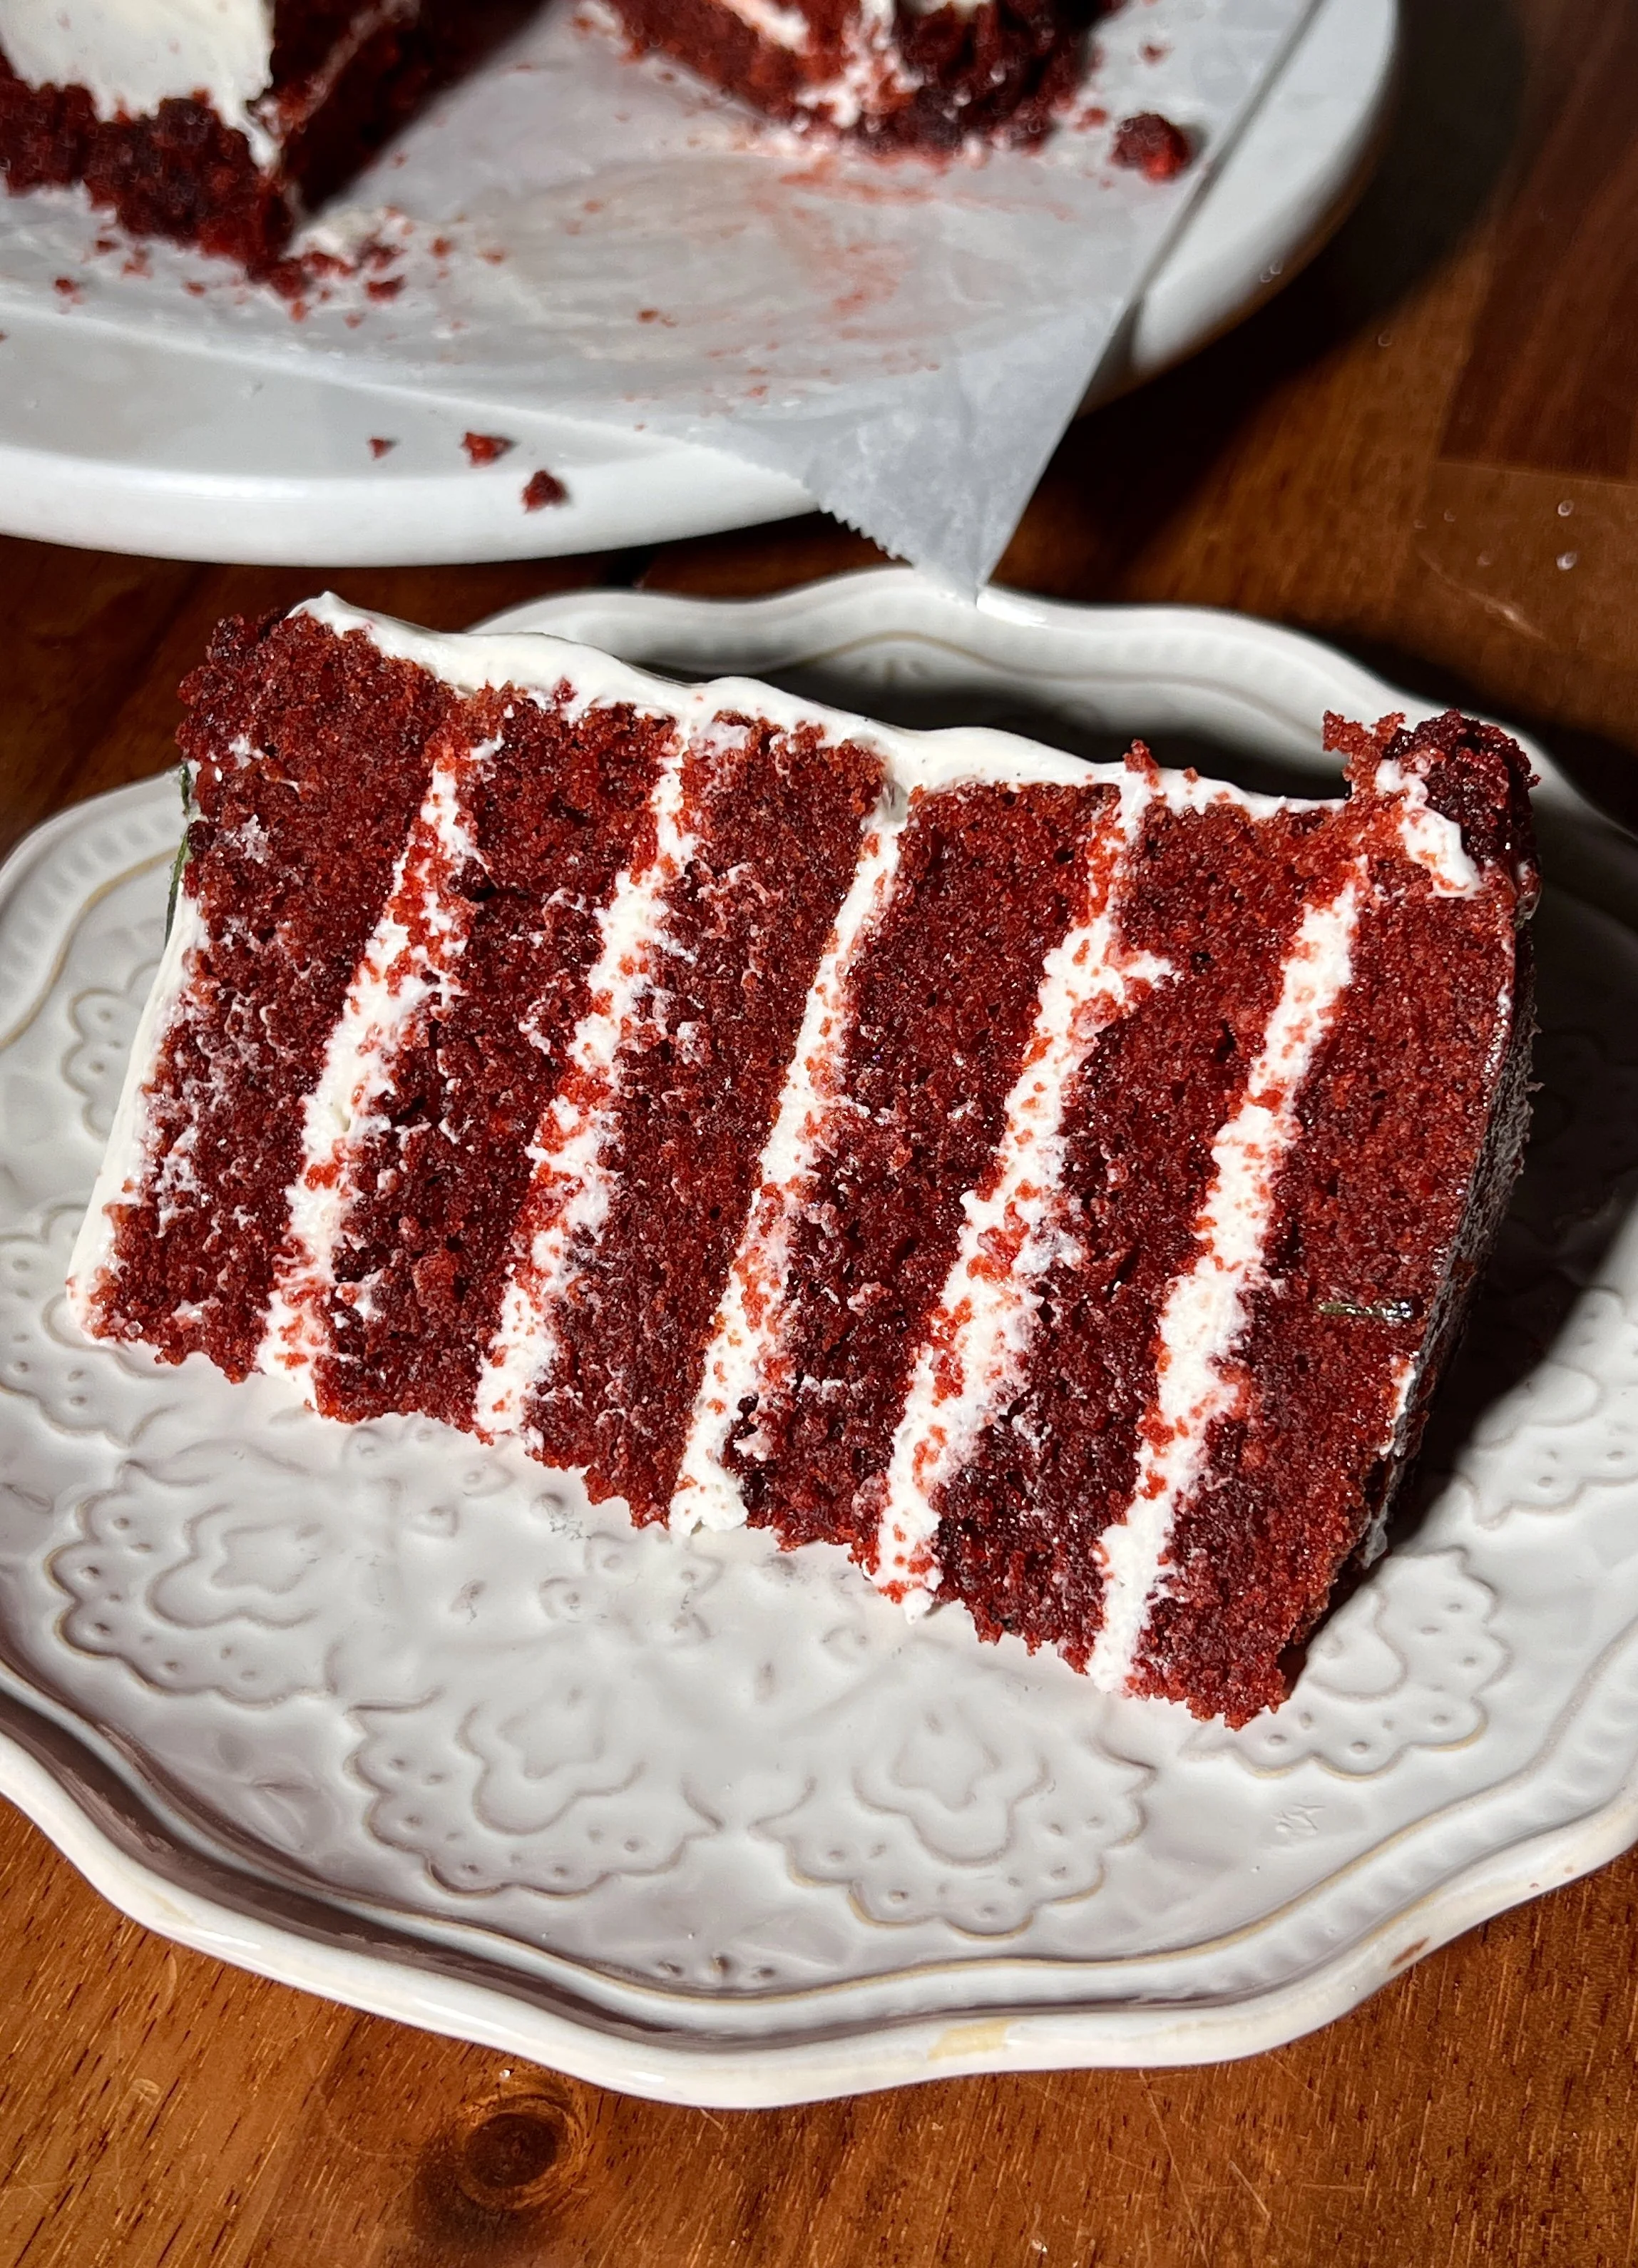
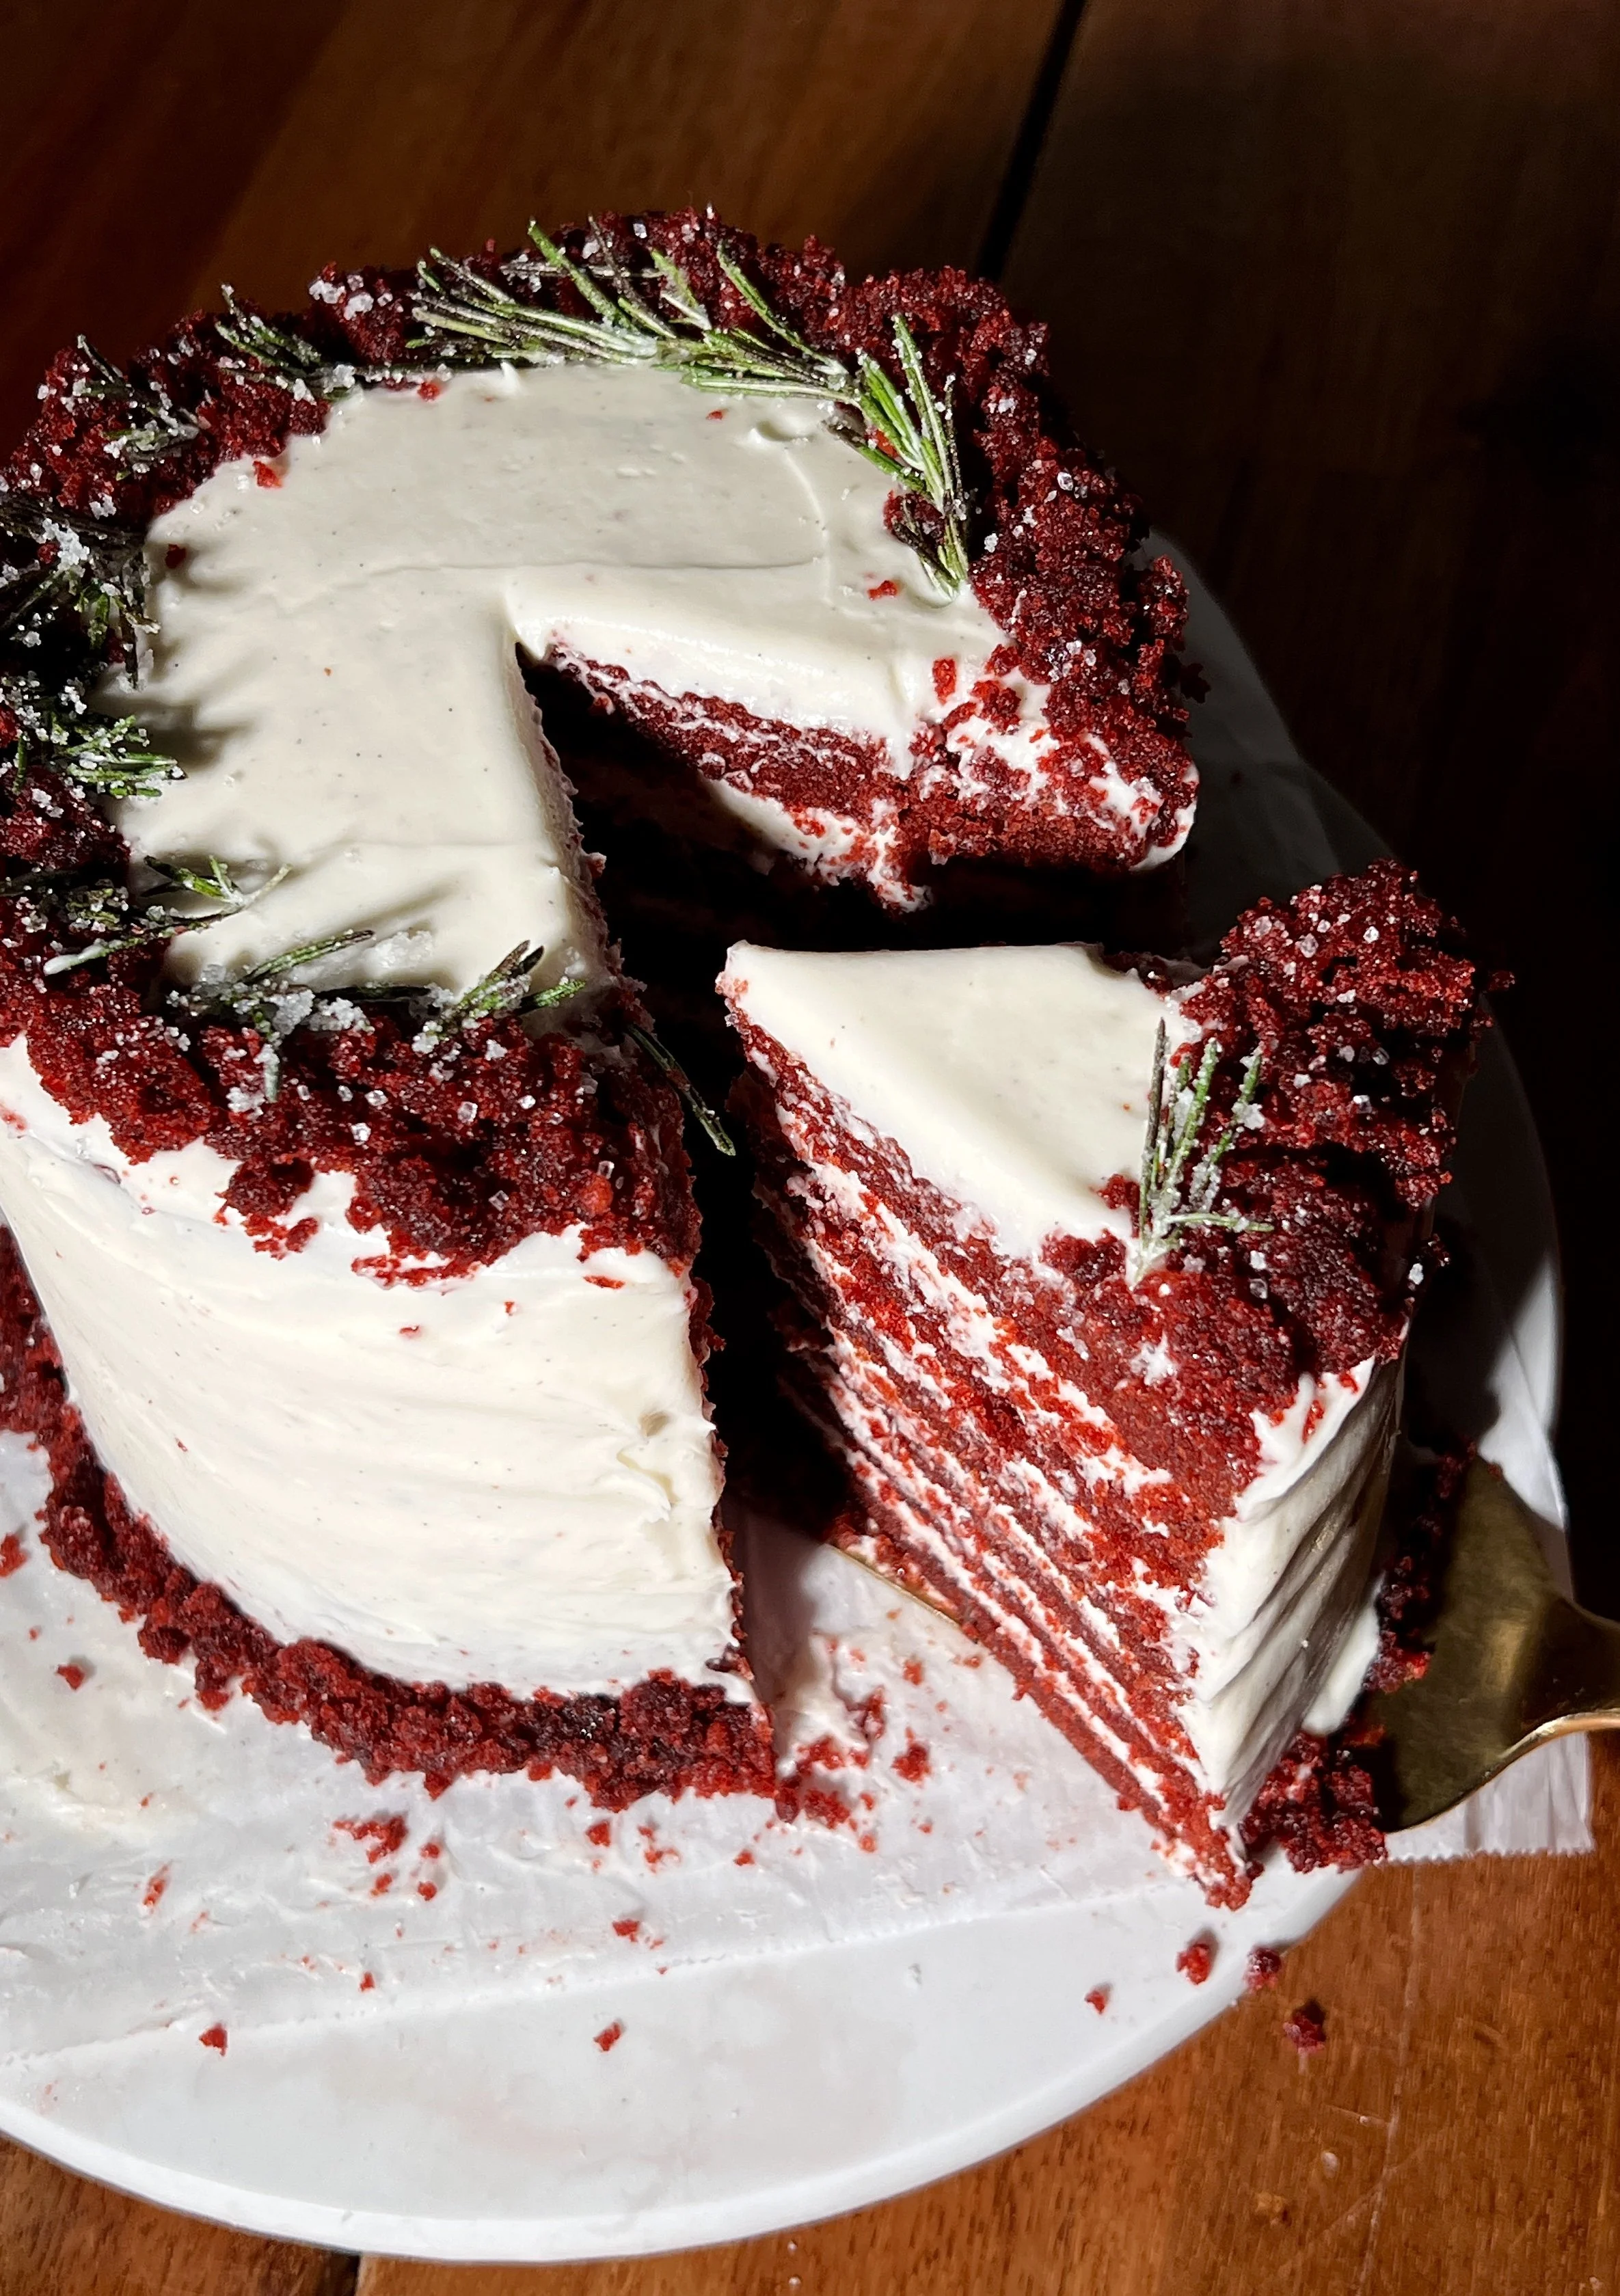
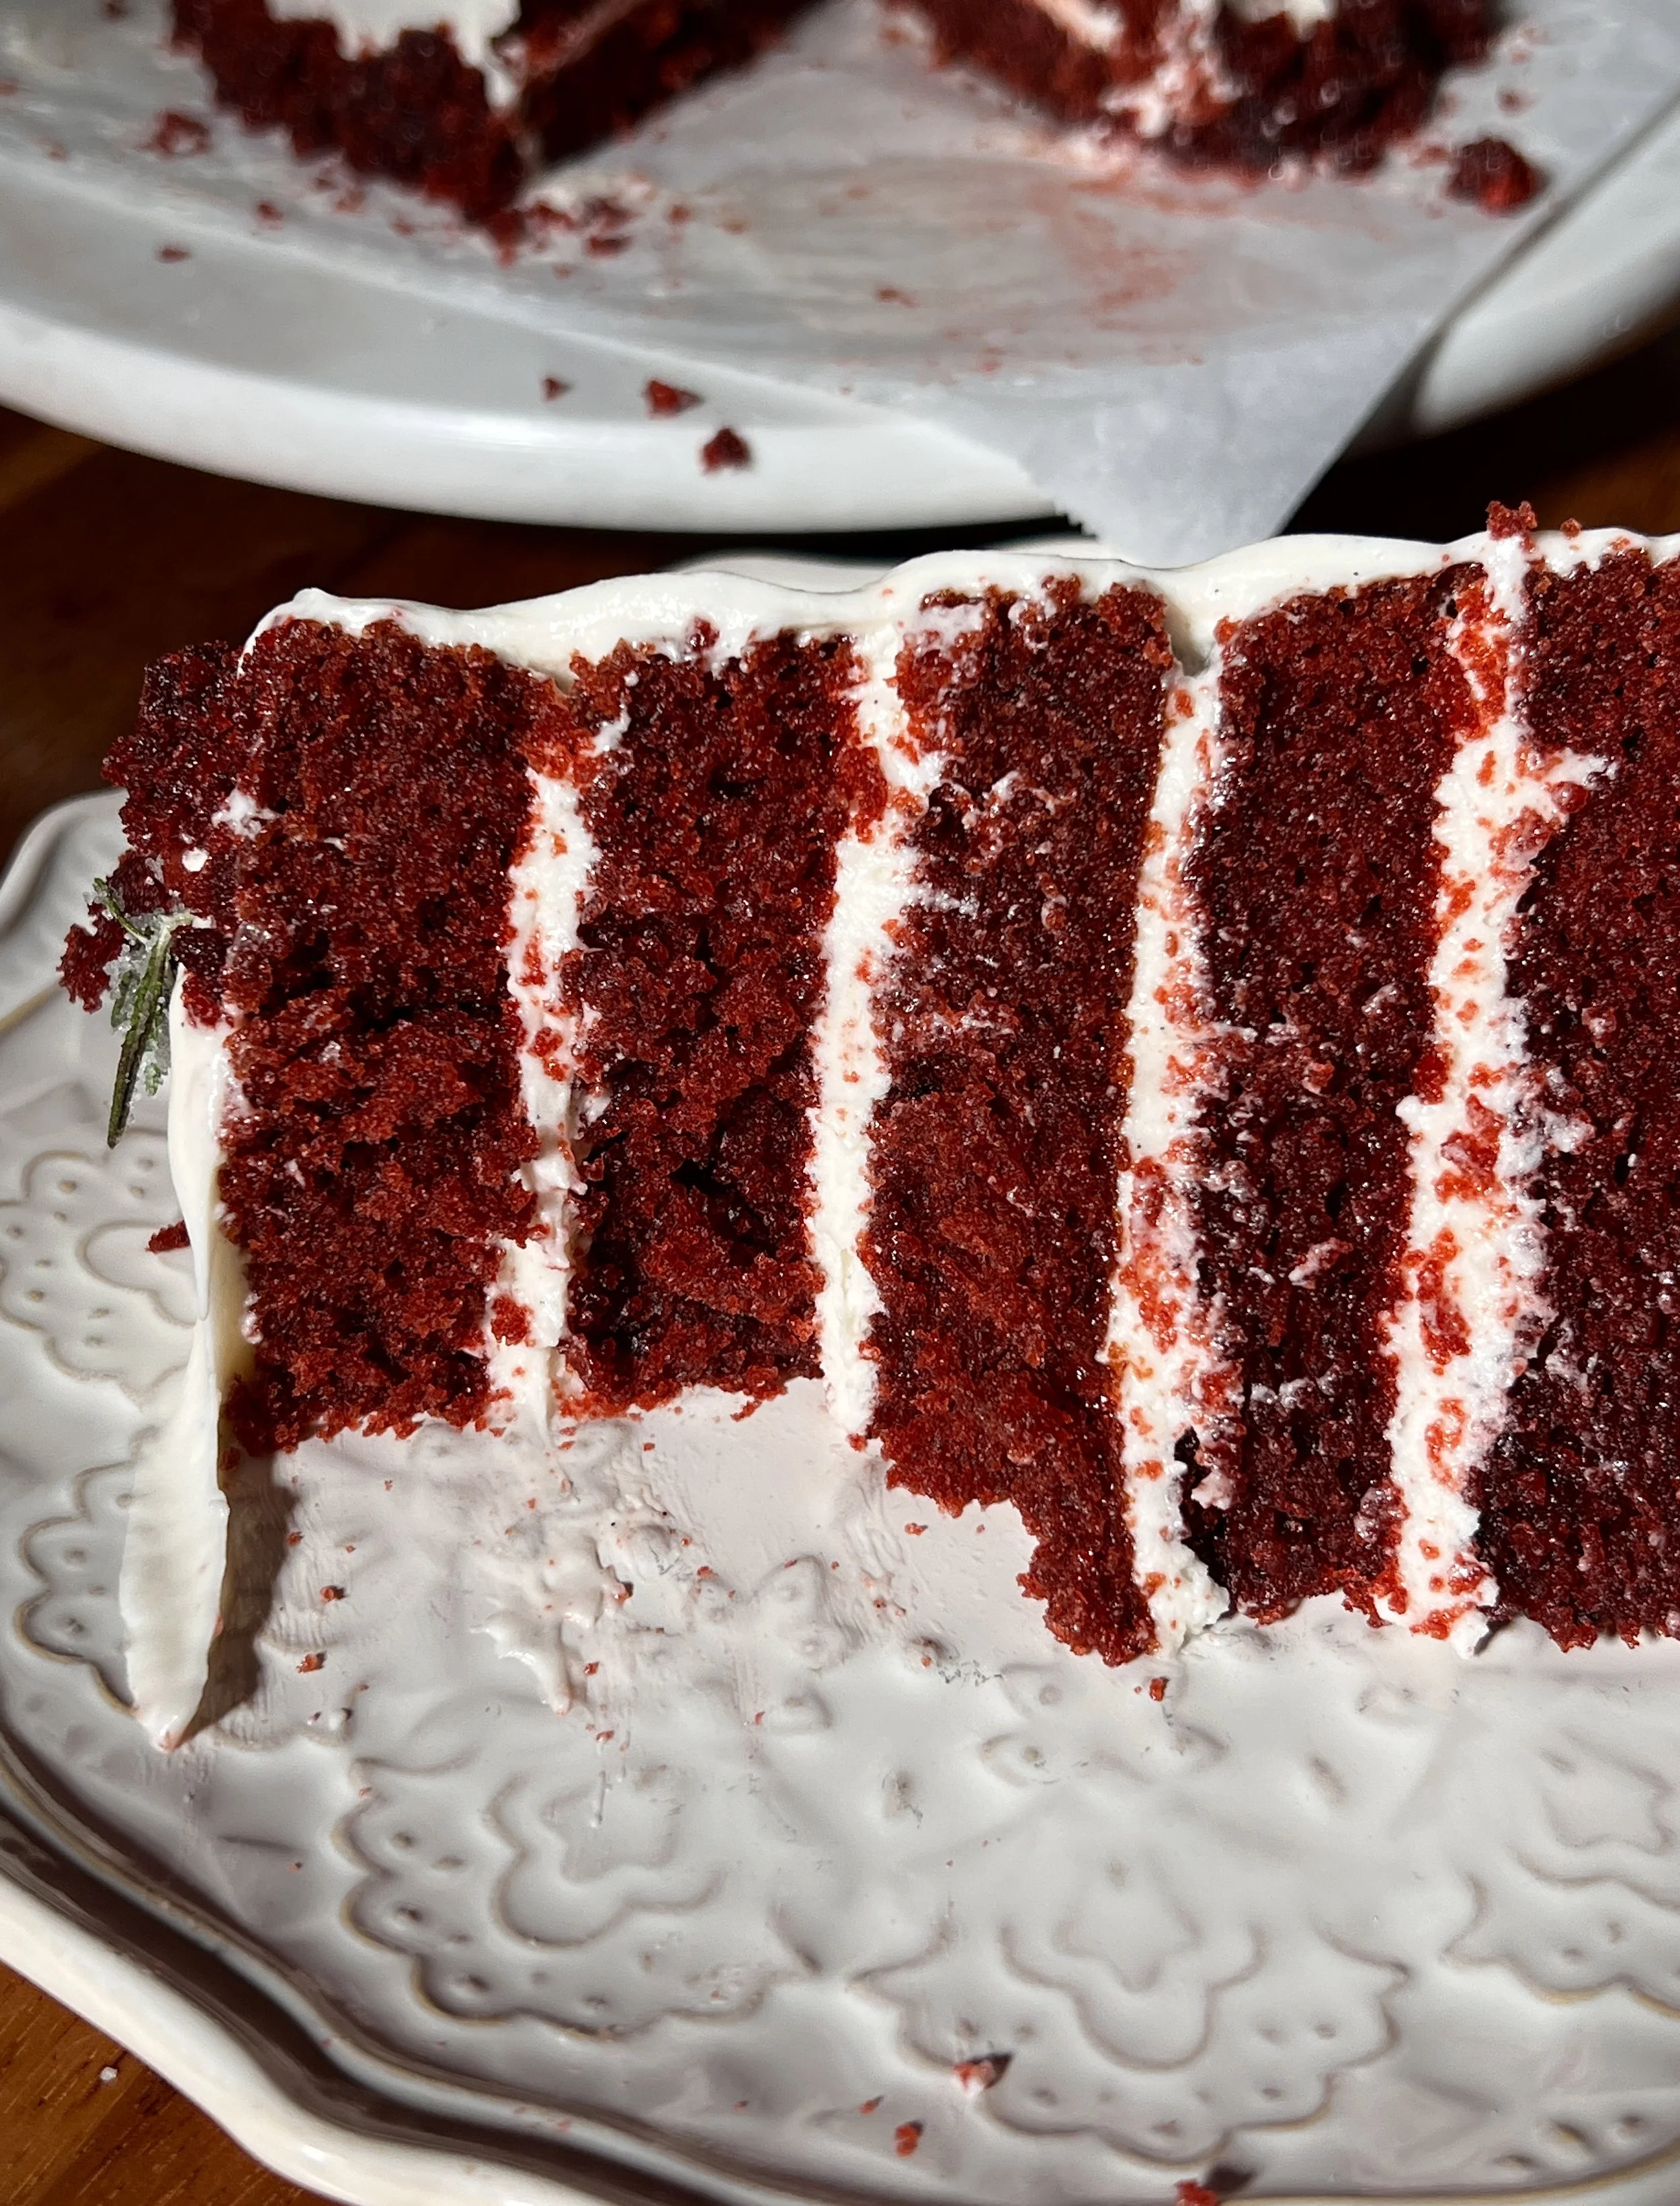
6-Layer Red Velvet Cake
This 6-Layer Red Velvet Cake is unbelievably soft, moist, and tender with a melt-in-your-mouth crumb and that signature light chocolatey red velvet flavor. Each layer is stacked high with a creamy, tangy, and ultra-lush cream cheese frosting that complements the cake perfectly. It’s a show-stopping holiday dessert that’s elegant, festive, and guaranteed to impress at any gathering.
If you try out this recipe, I’d love to see it! Leave a comment with a star rating below and tag @wellmadebykiley on Instagram and hashtag it #wellmadebykiley
Ingredients You Need:
Full ingredients and recipe are in the recipe card below. Read through this section for all the ingredients substitution and baking tips!
All-Purpose Flour: Provides structure for the cake while keeping the crumb soft, tender, and melt-in-your-mouth.
Baking Soda: Helps the cake rise and creates that classic fluffy red velvet texture.
Baking Powder: Adds additional lift for tall, light, evenly risen layers.
Salt: Balances sweetness and enhances the cocoa and cream cheese flavors.
Unsweetened Dutch-Process Cocoa Powder: Gives red velvet its signature mild chocolate flavor and rich color contrast.
Granulated Sugar: Sweetens the cake and keeps the crumb moist and tender.
Avocado Oil or Neutral Oil: Creates an ultra-moist, soft, and plush cake that stays tender for days.
Buttermilk: Reacts with cocoa and leavening for a fluffy crumb and classic red velvet tang.
Eggs: Bind the batter and add richness for smooth, even cake layers.
Vanilla Bean Paste or Extract: Adds warm, deep vanilla flavor to both the cake and the frosting.
Liquid Red Gel Food Coloring: Creates the vibrant, iconic red velvet color without thinning the batter.
Hot Freshly Brewed Coffee: Deepens the chocolate flavor and enhances richness without tasting like coffee.
White Vinegar: Reacts with baking soda for added lift and authentic red velvet flavor.
Cream Cheese: Creates a rich, tangy, creamy frosting that pairs perfectly with red velvet cake.
Salted Butter: Adds smoothness and richness to the cream cheese frosting.
Powdered Sugar: Sweetens the frosting while keeping it silky and spreadable.
Salt (Pinch): Balances sweetness and enhances the tangy cream cheese flavor.

Why You’ll Love a 6-Layer Red Velvet Cake:
Incredibly Soft and Moist: The tender red velvet crumb practically melts in your mouth with every bite.
Signature Red Velvet Flavor: Lightly chocolatey, subtly tangy, and perfectly balanced — everything a classic red velvet cake should be.
Six Stunning Layers: Tall, impressive, and bakery-worthy, this cake makes a beautiful centerpiece for any celebration.
Lush Cream Cheese Frosting: Creamy, tangy, and ultra-smooth frosting complements the red velvet flavor perfectly.
Holiday-Perfect Dessert: Festive, elegant, and crowd-pleasing — ideal for Christmas gatherings or winter celebrations.
Made From Simple Ingredients: No complicated techniques — just a classic homemade cake with unforgettable flavor.
Stays Soft for Days: The moisture-rich batter keeps the cake tender even after refrigeration.
Great for Make-Ahead: Layers and frosting can be prepared in advance, making assembly stress-free.
Picture-Perfect Presentation: The vibrant red layers contrasted with white frosting make this cake a showstopper in photos and on the table.
Tips for Making a 6-Layer Red Velvet Cake:
Weigh Your Ingredients: Using a kitchen scale ensures accuracy and gives you the most consistent, tender red velvet crumb.
Sift the Dry Ingredients: Sifting the flour, cocoa powder, and leavening together removes lumps and helps the cake bake up lighter and more evenly.
Don’t Skip the Hot Coffee: Even a small amount deepens the cocoa flavor and enhances the classic red velvet taste. You won’t taste the coffee — just a richer chocolate note.
Use Room-Temperature Ingredients: Softened butter, room-temp eggs, and room-temp buttermilk help the batter mix smoothly without overworking.
Mix Gently Once the Flour Is Added: Over-mixing can make the cake dense. Fold just until no streaks of flour remain.
Use High-Quality Cocoa Powder: A good cocoa enhances the flavor and richness of your red velvet layers.
Don’t Over-Bake: The layers should be soft and springy. Remove from the oven when a toothpick comes out with a few moist crumbs.
Cool Layers Completely Before Frosting: This keeps the cream cheese frosting smooth and prevents melting or sliding.
Chill the Layers Before Assembly: Slightly chilled cake layers are sturdier and easier to stack without breaking.
Level the Layers if Needed: Even cake layers create a cleaner, bakery-style finish.
Whip the Cream Cheese Frosting Smoothly: Beat until light and silky, but avoid overmixing to maintain structure.
Crumb Coat First: A thin layer of frosting seals in crumbs and makes the final coat perfectly smooth.
Chill Before Slicing: Refrigerate at least 30 minutes for cleaner, photo-ready slices.
How to Store a 6-Layer Red Velvet Cake:
Refrigerator: Store the fully frosted cake in an airtight container for 4–5 days. The cream cheese frosting keeps it fresh and the layers stay soft and moist.
Room Temperature (Short-Term): Individual slices can sit out for up to 2 hours when serving, but the full cake should be refrigerated due to the cream cheese frosting.
Freezer (Whole Cake or Slices): Freeze tightly wrapped slices or the entire cake (without decorations) for up to 2 months. Thaw overnight in the refrigerator before serving.
Freeze Cake Layers Separately: Unfrosted cake layers freeze beautifully. Wrap each cooled layer in plastic wrap + foil and freeze for up to 3 months. Thaw before frosting and assembling.
Make-Ahead Option: Bake the cake layers 1–2 days in advance, store tightly wrapped in the refrigerator, then frost the day you plan to serve for the freshest texture.
Refresh Before Serving: For best texture, let chilled slices sit at room temperature for about 20–30 minutes before eating.
FAQs:
Q: Can I make the cake layers ahead of time?
A: Yes. You can bake the layers 1–2 days in advance. Once cooled, wrap them tightly in plastic wrap and refrigerate. They stay soft and moist and are even easier to frost when chilled.
Q: Can I freeze the cake layers before assembling?
A: Absolutely. Wrap each cooled layer in plastic wrap and foil, then freeze for up to 3 months. Thaw in the refrigerator before frosting.
Q: Do I have to use hot coffee in the batter?
A: Yes, it’s highly recommended. Coffee enhances the chocolate flavor without making the cake taste like coffee. You can substitute hot water, but the flavor won’t be as rich.
Q: Why is my red velvet cake not as vibrant?
A: The shade varies based on the cocoa powder and food coloring used. Gel food coloring gives the most vibrant red without altering the texture.
Q: Can I use natural food coloring instead of artificial?
A: You can, but natural dyes often produce a deeper maroon or muted red instead of a bright red velvet color. The flavor remains delicious either way.
Q: Do I have to sift the dry ingredients?
A: Yes. Red velvet cake has a fine, tender crumb, and sifting ensures a smooth batter and the softest texture.
Q: Can I use low-fat cream cheese for the frosting?
A: Full-fat cream cheese is strongly recommended. Low-fat versions can be runny and won’t produce a stable, silky frosting.
Q: How do I get super smooth cream cheese frosting?
A: Beat the cream cheese and butter until completely smooth before adding sugar. Also ensure they’re both at room temperature.
Q: How do I slice the cake cleanly?
A: Chill the cake for at least 30 minutes and warm a knife under hot water, wiping between slices for sharp, clean edges.
Q: Can I turn this into a 3-layer cake instead of 6?
A: Yes. Simply bake thicker layers and split them after cooling, or bake fewer layers for a more traditional look.
Q: How long can the frosted cake sit out for serving?
A: Up to 2 hours. After that, refrigerate due to the cream cheese frosting.

Check out my other cake recipes:

Make sure to tag me @wellmadebykiley on Instagram and leave a review or comment if you try this 6-layer red velvet cake. Happy baking!