

Fully Crusted Upside-Down S’mores Cheesecake (No-Bake)
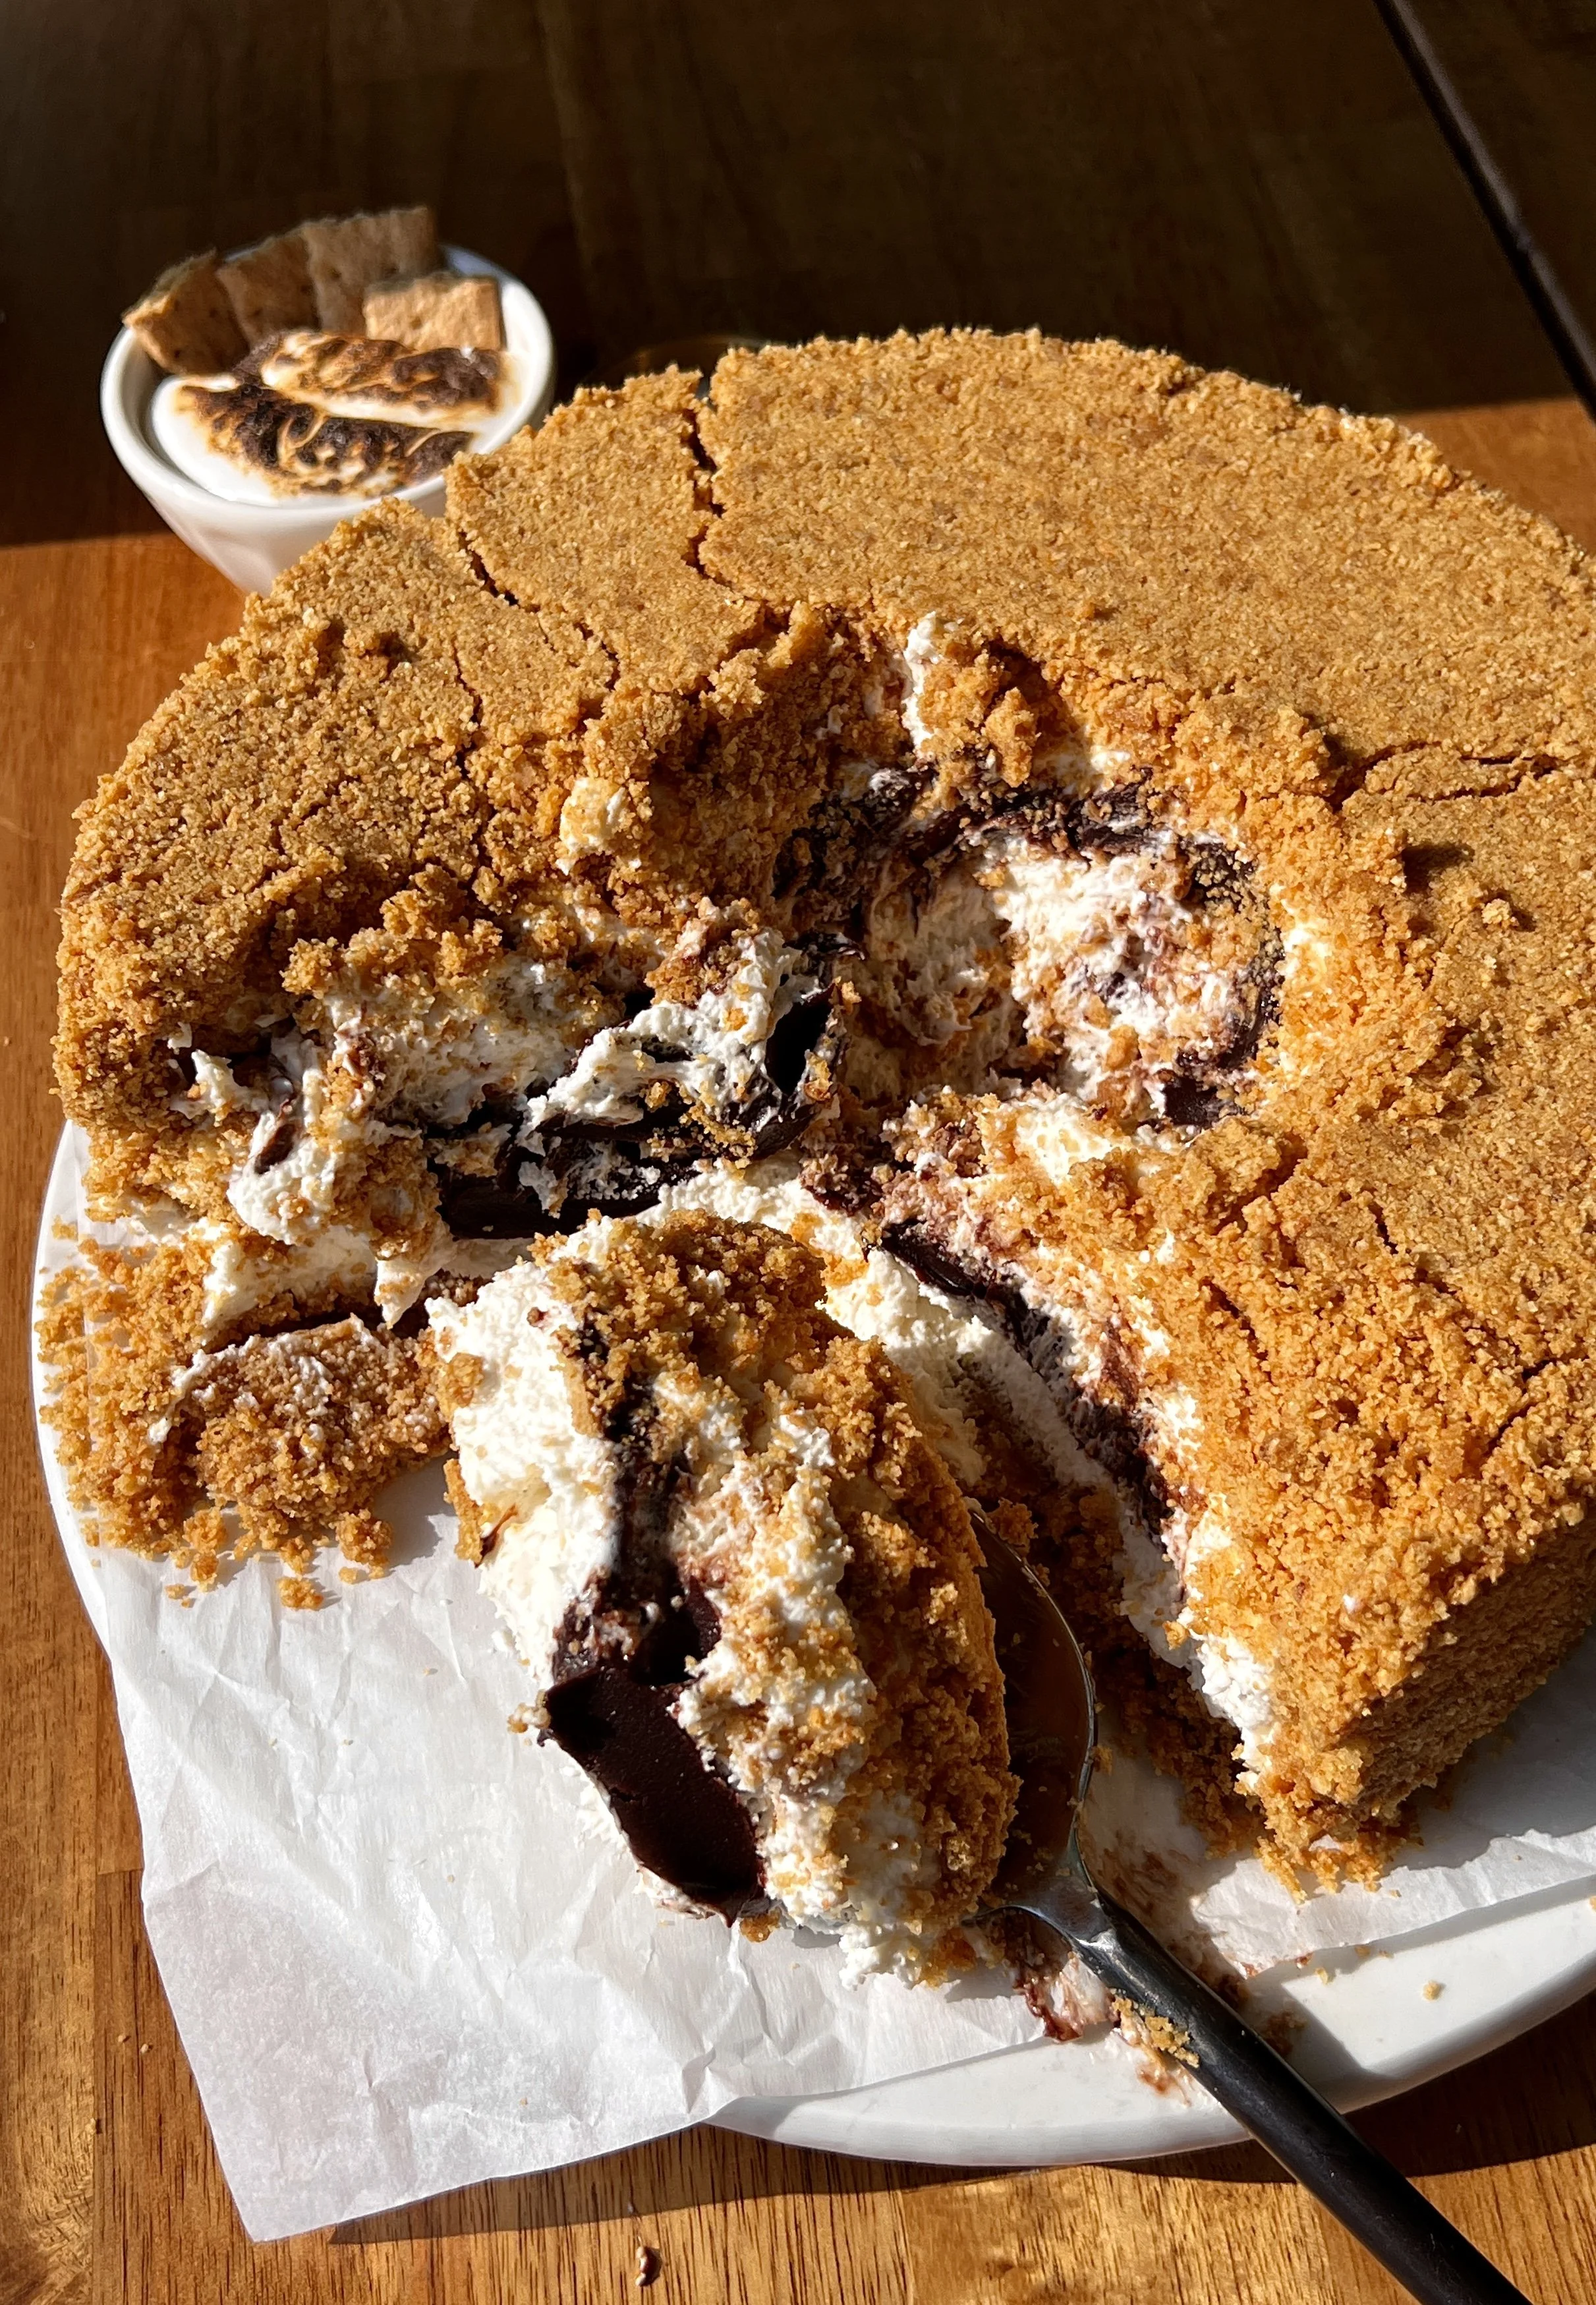
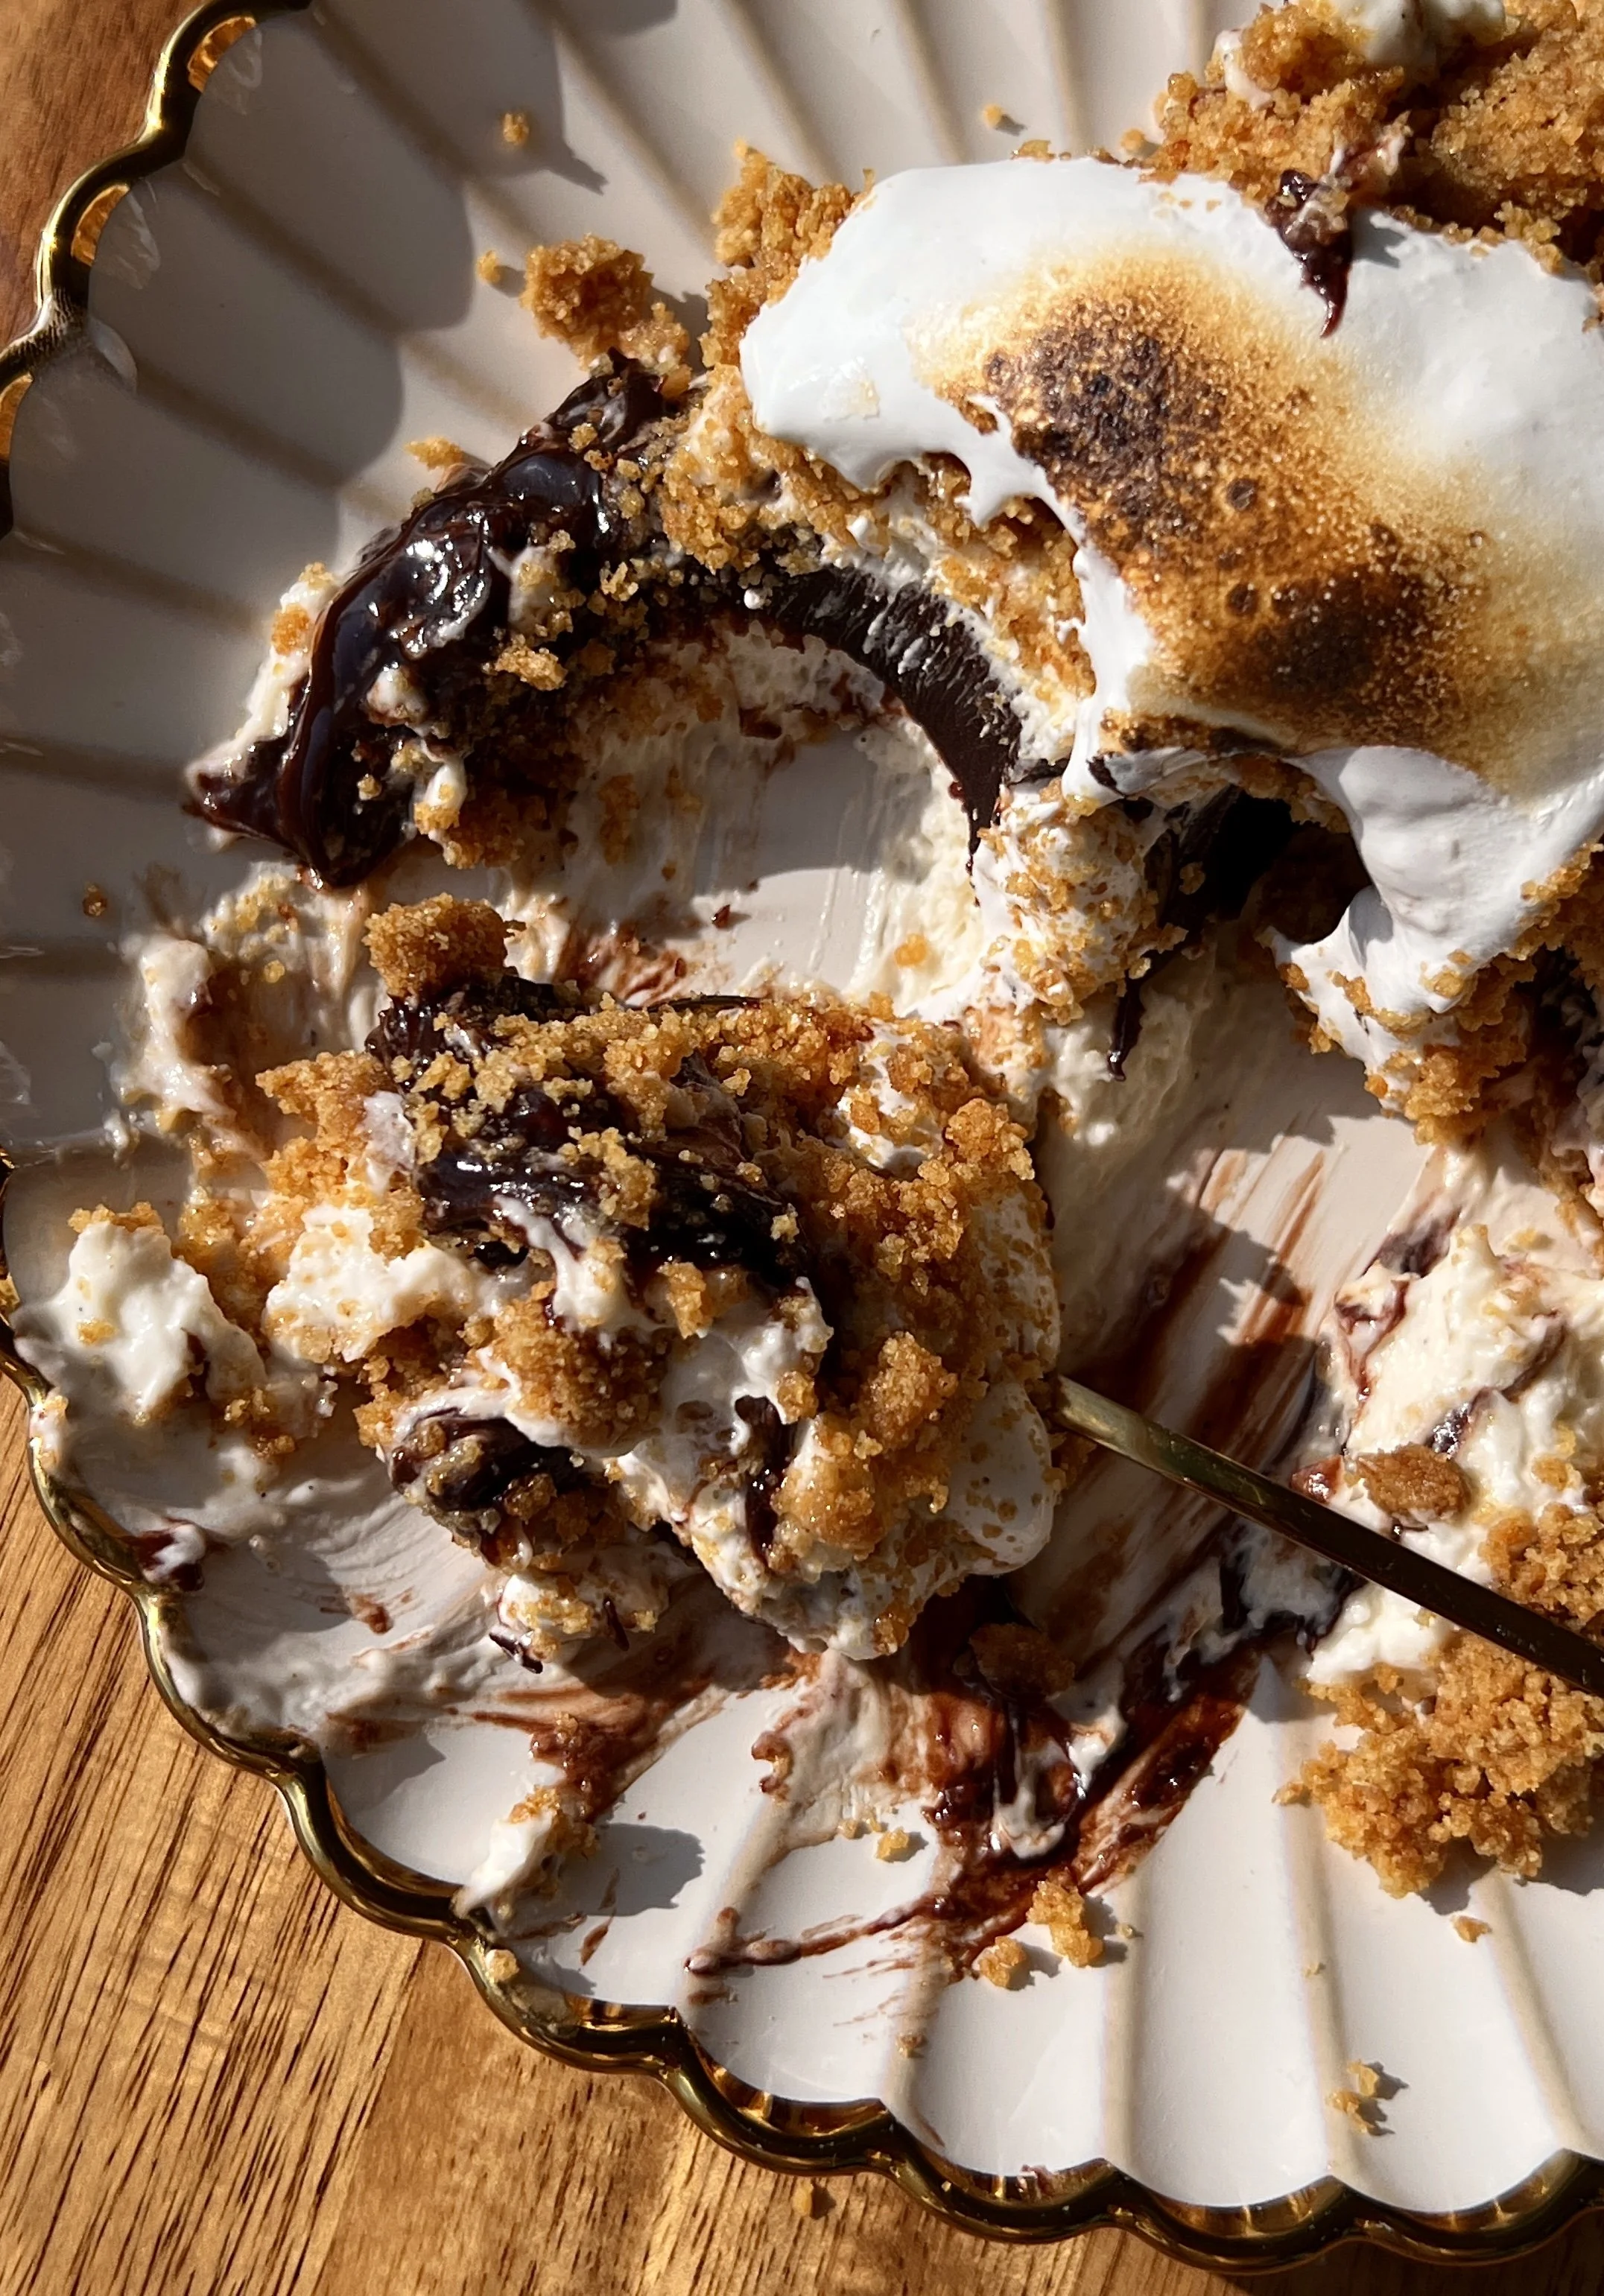
This Fully Crusted Upside-Down S'mores Cheesecake is a fun and stunning no-bake twist on a classic s'mores dessert that is as impressive as it is irresistible. It starts with a perfectly crunchy and buttery graham cracker crust on top, then layers of a rich and creamy toasted marshmallow cheesecake filling and a thick and rich hot fudge sauce in the middle that melts into every single bite. Inverted to serve and smashed into with a spoon for the most fun and interactive dessert experience — finished with a dollop of toasted marshmallow fluff for the ultimate s'mores finishing touch!
If you try out this recipe, I’d love to see it! Leave a comment with a star rating below and tag @wellmadebykiley on Instagram and hashtag it #wellmadebykiley
Ingredients You Need:
Full ingredients and recipe are in the recipe card below. Read through this section for all the ingredients substitution and baking tips!
Graham Crackers: The base of the perfectly crunchy and buttery fully crusted crust that encases the top, bottom, and all the way around the sides of this cheesecake — crushed into fine crumbs and mixed with melted butter for that classic s'mores crunch in every single bite. Biscoff cookies work as a substitute.
Salted Butter: Melted into the graham cracker crust to bind the crumbs together and create a rich, buttery, and perfectly crunchy crust that holds its shape beautifully when inverted — also melted into the hot fudge sauce for a rich, silky, and deeply indulgent finish.
Semi-Sweet Chocolate Chips: Melted together with the butter to create the rich, deep, and intensely chocolatey base of the homemade hot fudge sauce that is layered in the center of the cheesecake for the most indulgent s'mores surprise in every single bite.
Half And Half or Heavy Cream: Whisked into the hot fudge sauce for a rich, silky, and perfectly smooth consistency — also whipped to stiff peaks and folded into the cheesecake filling for a light, airy, and perfectly set no-bake cheesecake texture throughout.
Granulated Sugar: Sweetens the homemade hot fudge sauce and helps create a perfectly balanced, rich, and deeply chocolatey flavor throughout.
Unsweetened Cocoa Powder: Whisked into the hot fudge sauce for an extra layer of deep, rich, and intensely chocolatey flavor that makes the sauce truly irresistible in the center of the cheesecake.
Salt: Balances the sweetness and enhances all the rich s'mores flavors throughout the crust, hot fudge sauce, and toasted marshmallow cheesecake filling.
Vanilla Extract: Adds a warm, sweet, and aromatic flavor that enhances the hot fudge sauce and the toasted marshmallow cheesecake filling throughout.
Cream Cheese: The base of the rich and creamy toasted marshmallow cheesecake filling — make sure it is fully at room temperature before beating for the smoothest, most lump-free filling possible.
Powdered Sugar: Sweetens and thickens the toasted marshmallow cheesecake filling into a smooth, perfectly balanced, and luscious consistency throughout.
Marshmallow Fluff or Creme: The star of the toasted marshmallow cheesecake filling — toasted with a kitchen torch or under the broiler before folding into the filling for a warm, smoky, and deeply irresistible toasted marshmallow flavor that makes this s'mores cheesecake truly one of a kind. Standard marshmallows work as a substitute.
Sour Cream or Greek Yogurt: Adds a subtle tang and extra creaminess to the toasted marshmallow cheesecake filling that balances the richness of the cream cheese and marshmallow fluff for the most perfectly smooth and silky texture throughout.
Vanilla Bean Paste or Extract: Adds a warm, sweet, and aromatic flavor to the toasted marshmallow cheesecake filling that enhances all the rich s'mores flavors beautifully throughout every single bite.
Why You’ll Love a Fully Crusted Upside-Down S’mores Cheesecake (No-Bake):
A Fun And Stunning S'mores Twist: This upside down no-bake cheesecake is the most fun, unique, and impressive twist on a classic s'mores dessert that is guaranteed to be the showstopper at any gathering or special occasion.
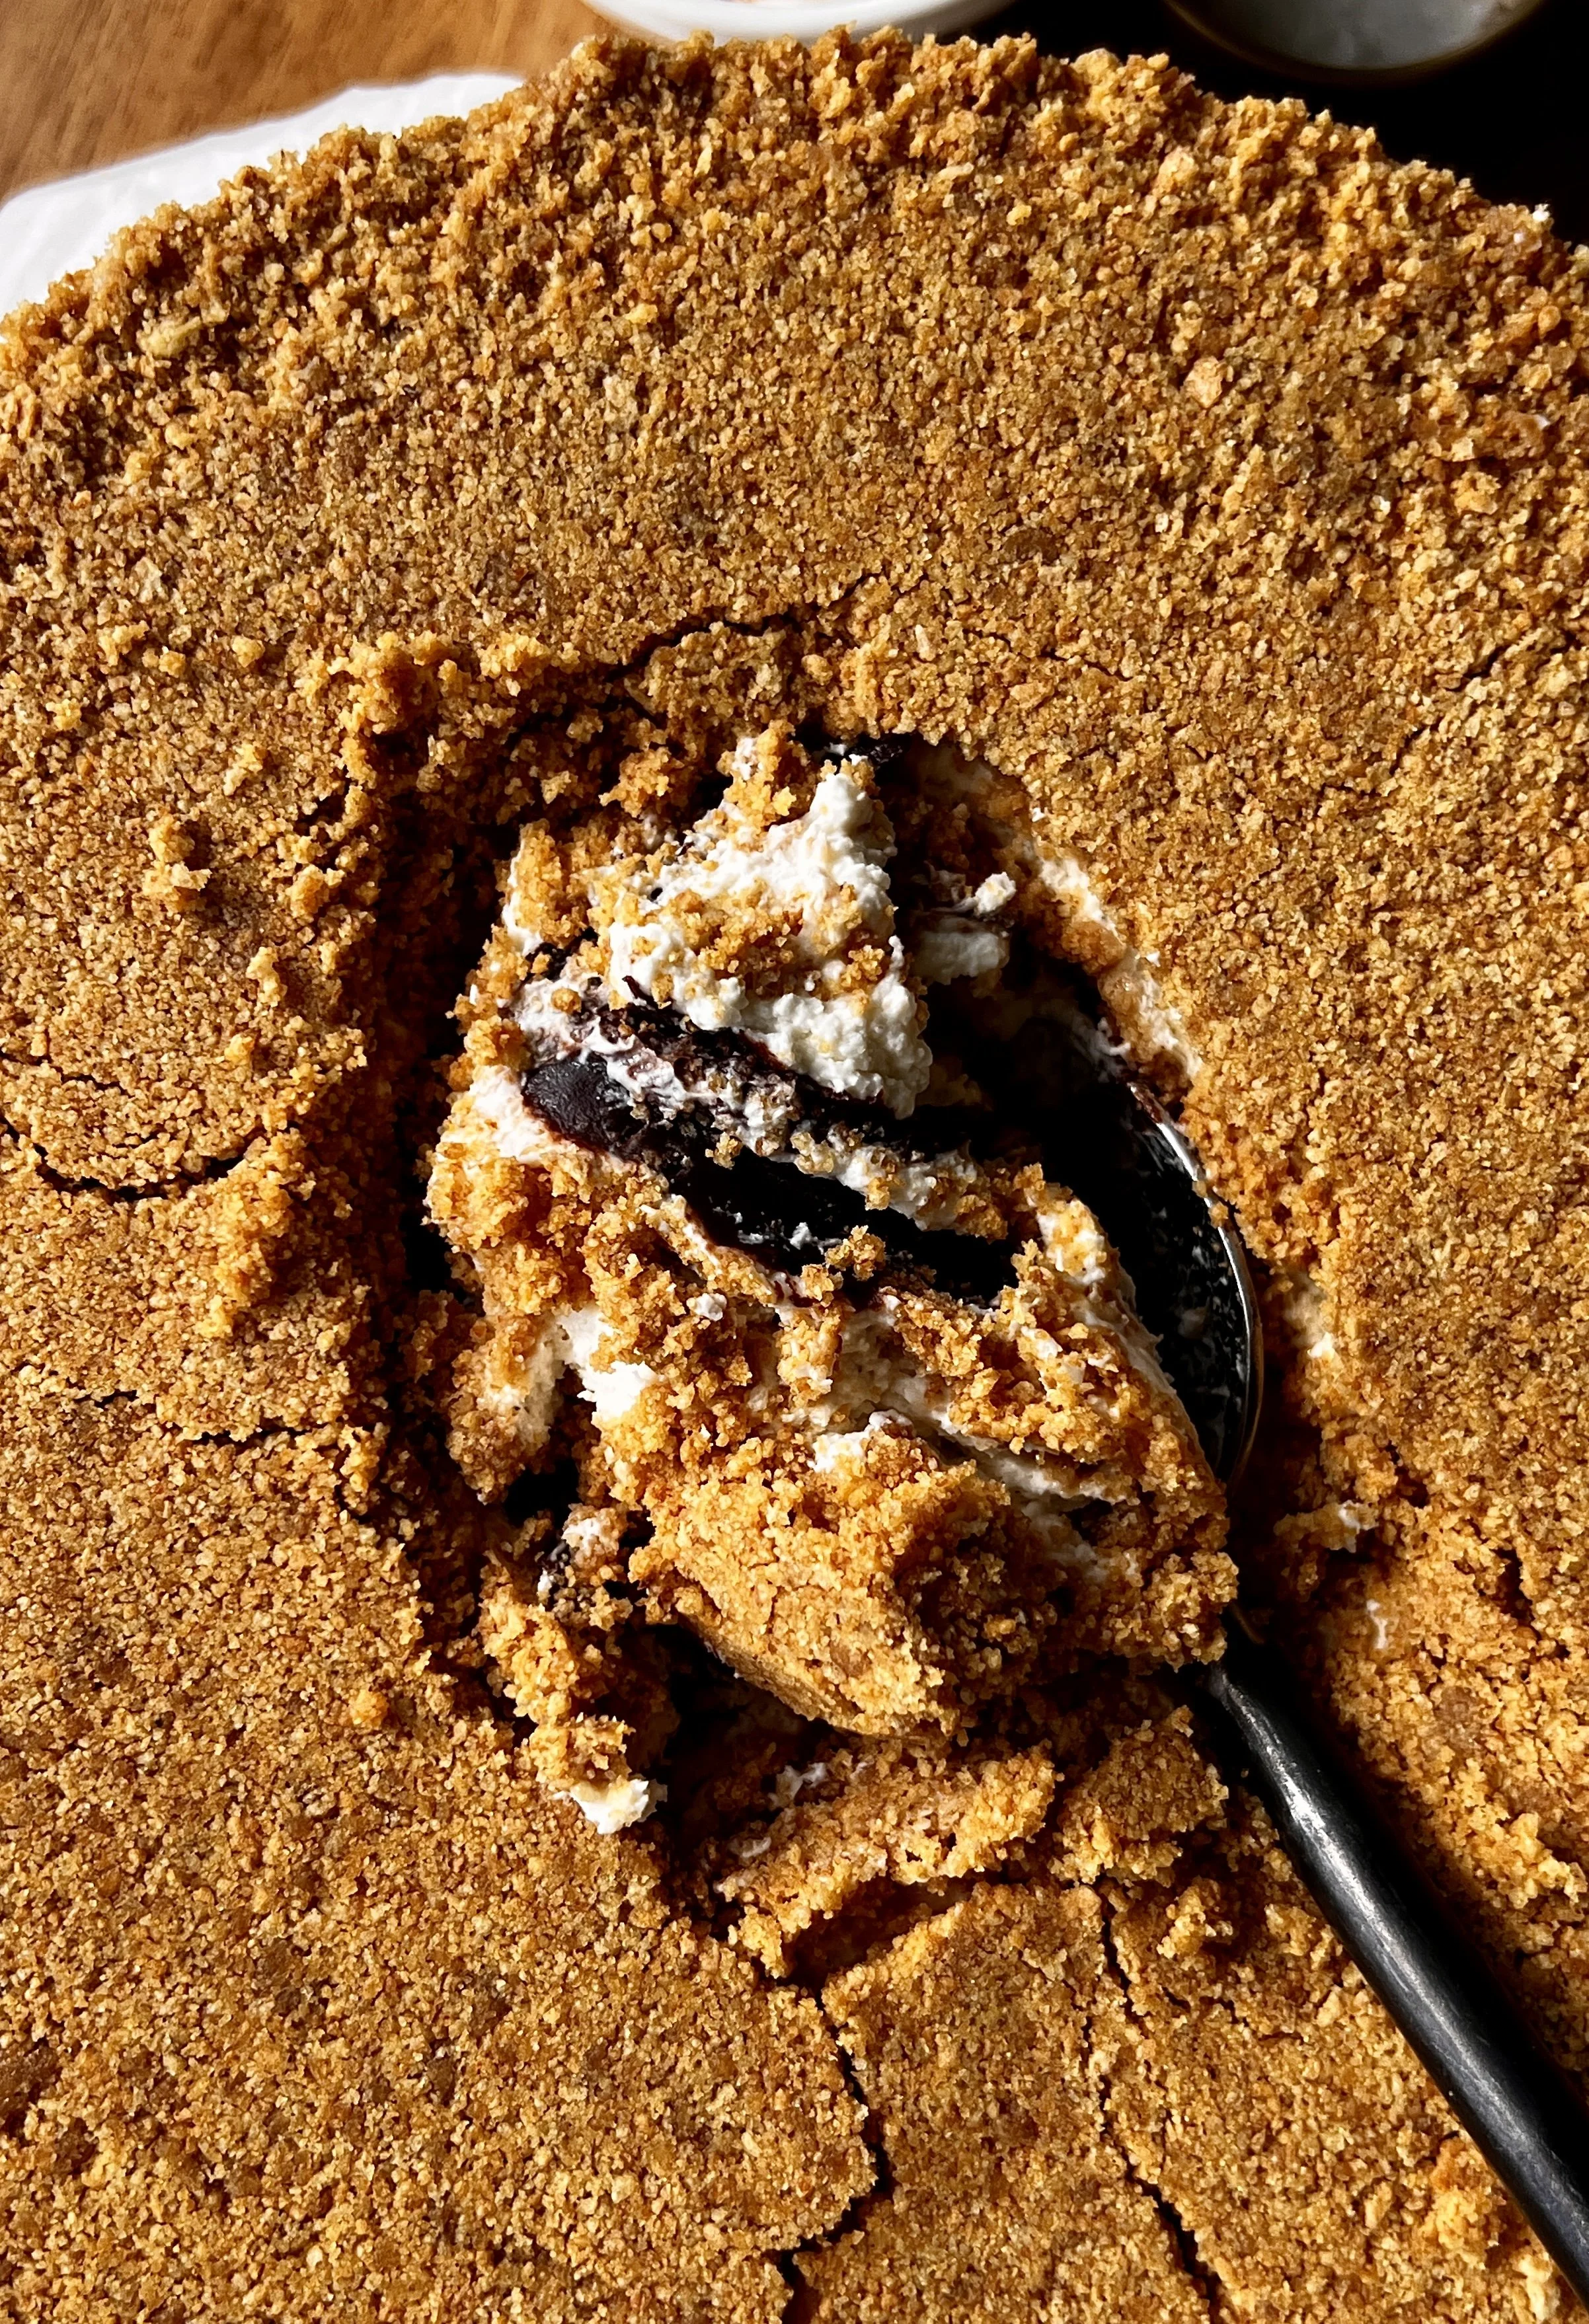
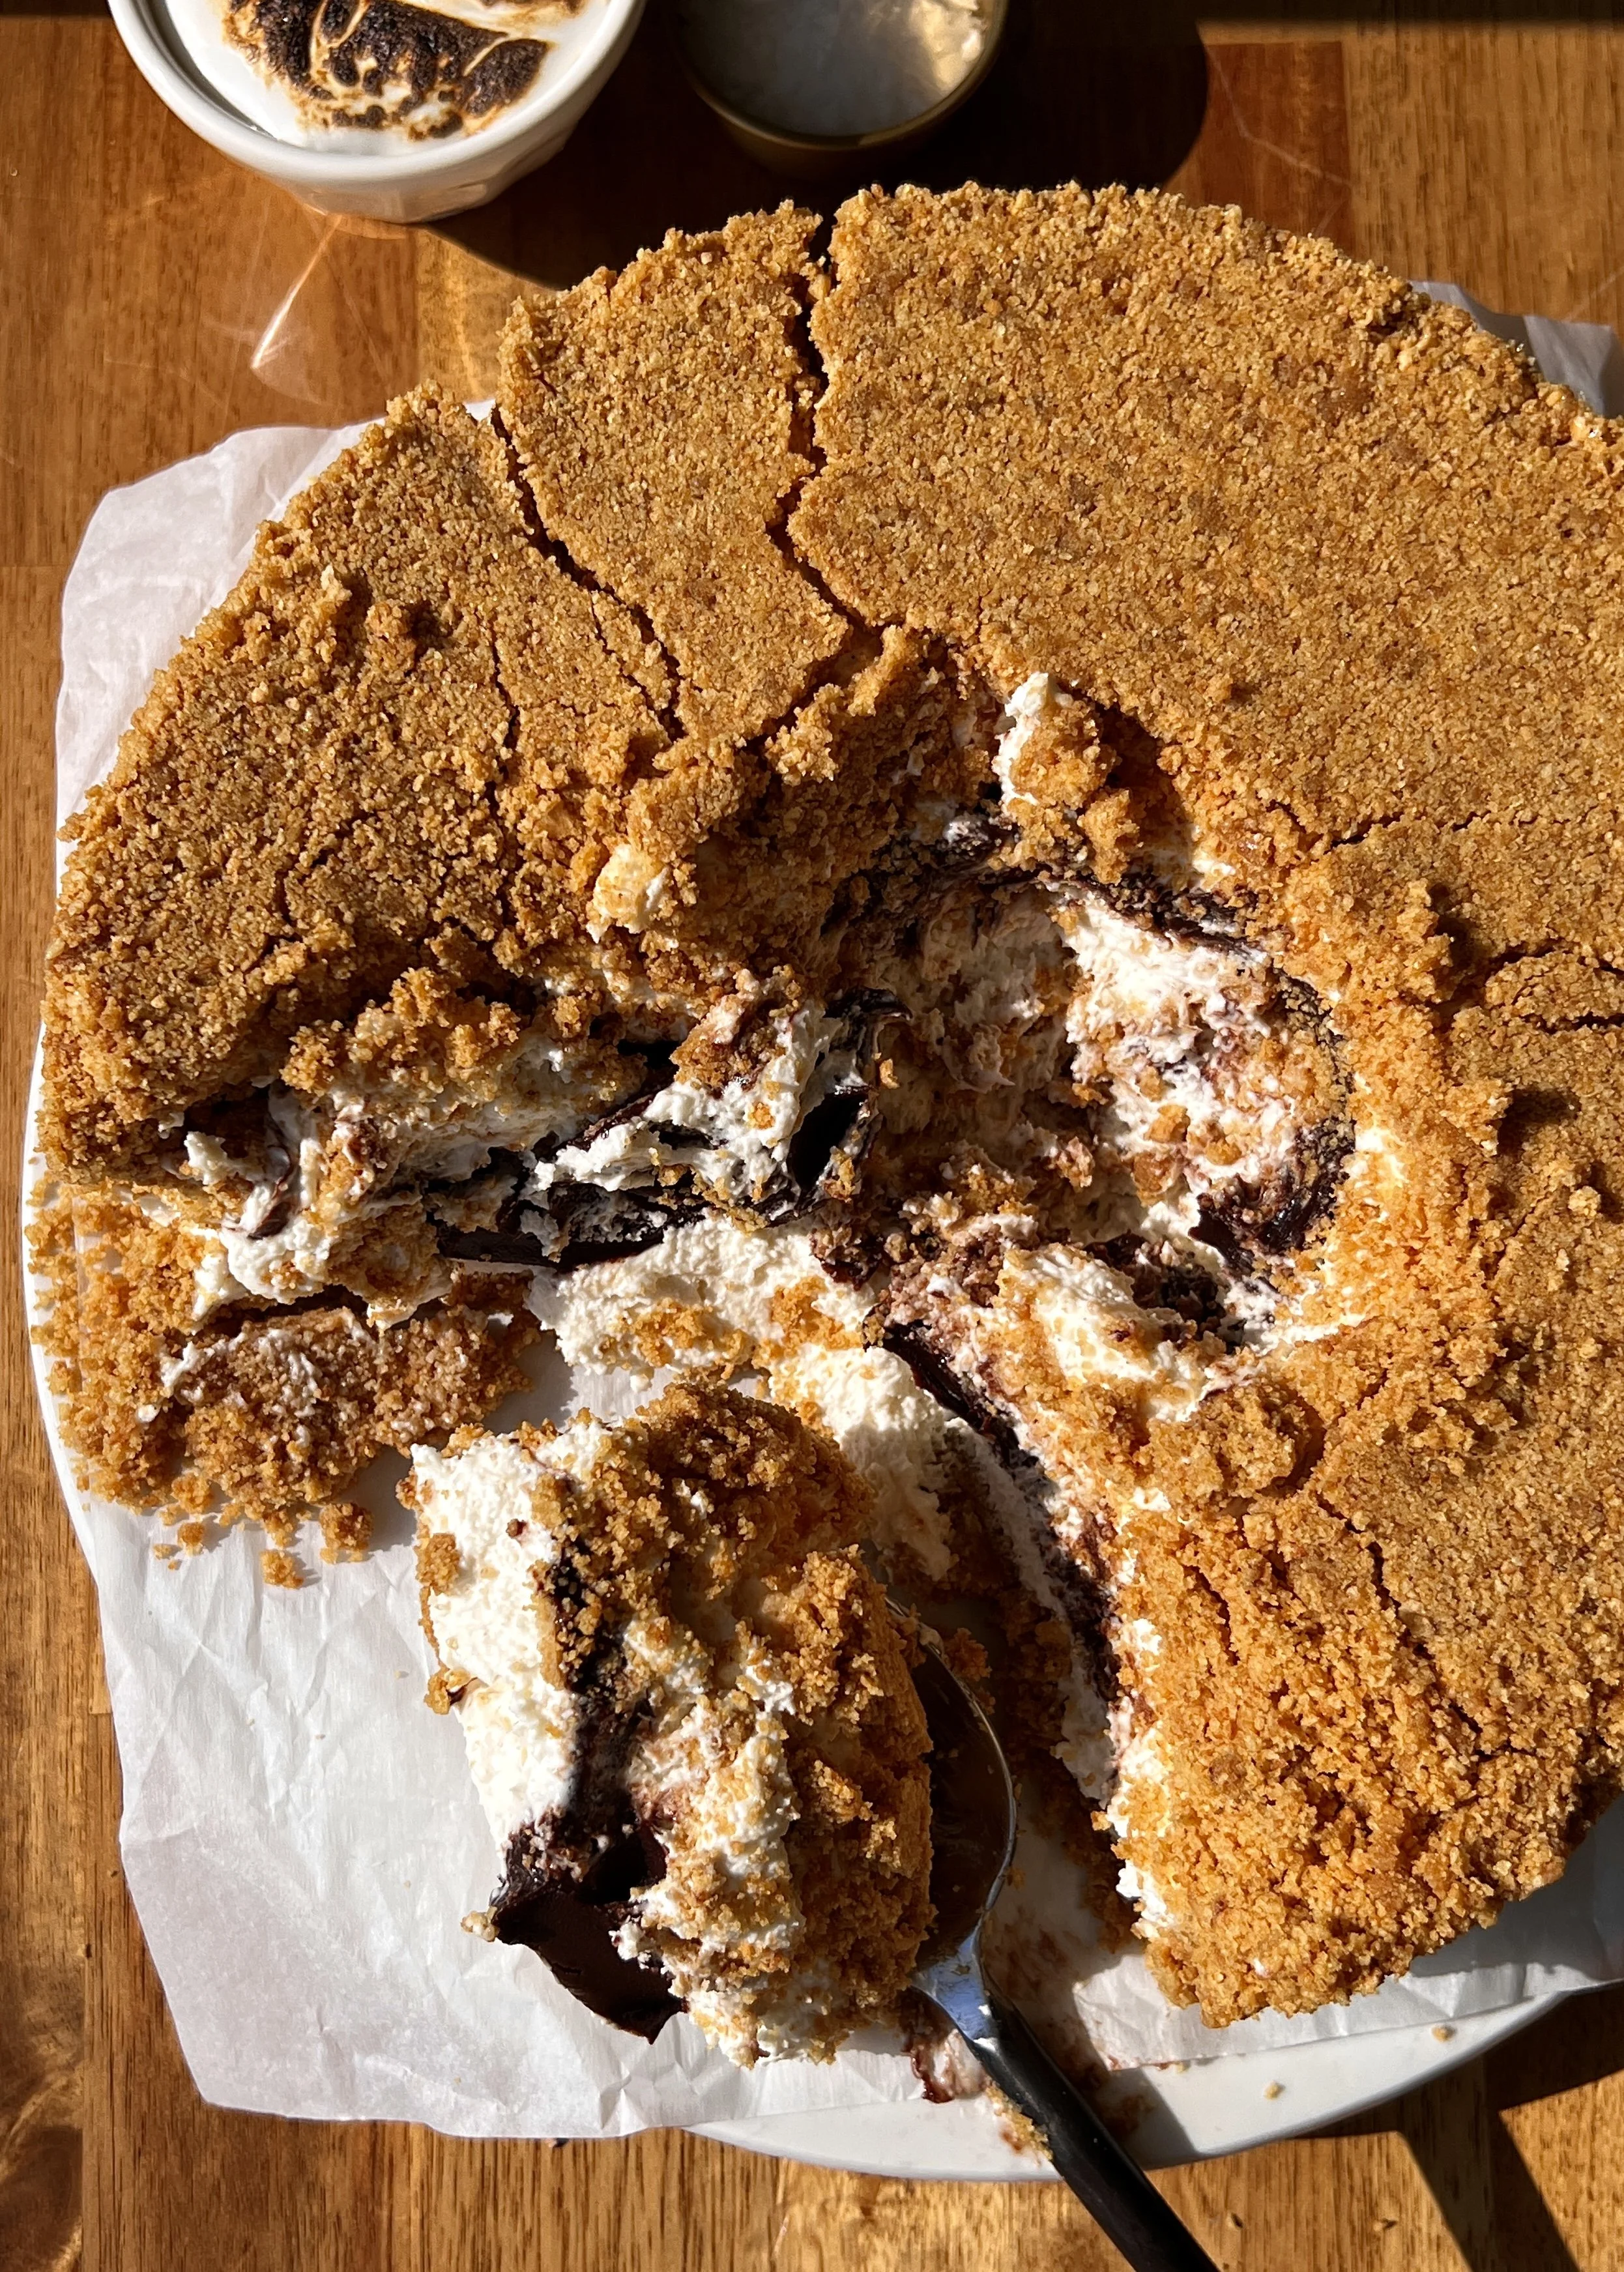
That Fully Crusted Graham Cracker Crust: This cheesecake is fully encased in a perfectly crunchy and buttery graham cracker crust on the top, bottom, and all the way around the sides — every single bite is surrounded by that classic s'mores crunch that makes this cheesecake truly one of a kind.
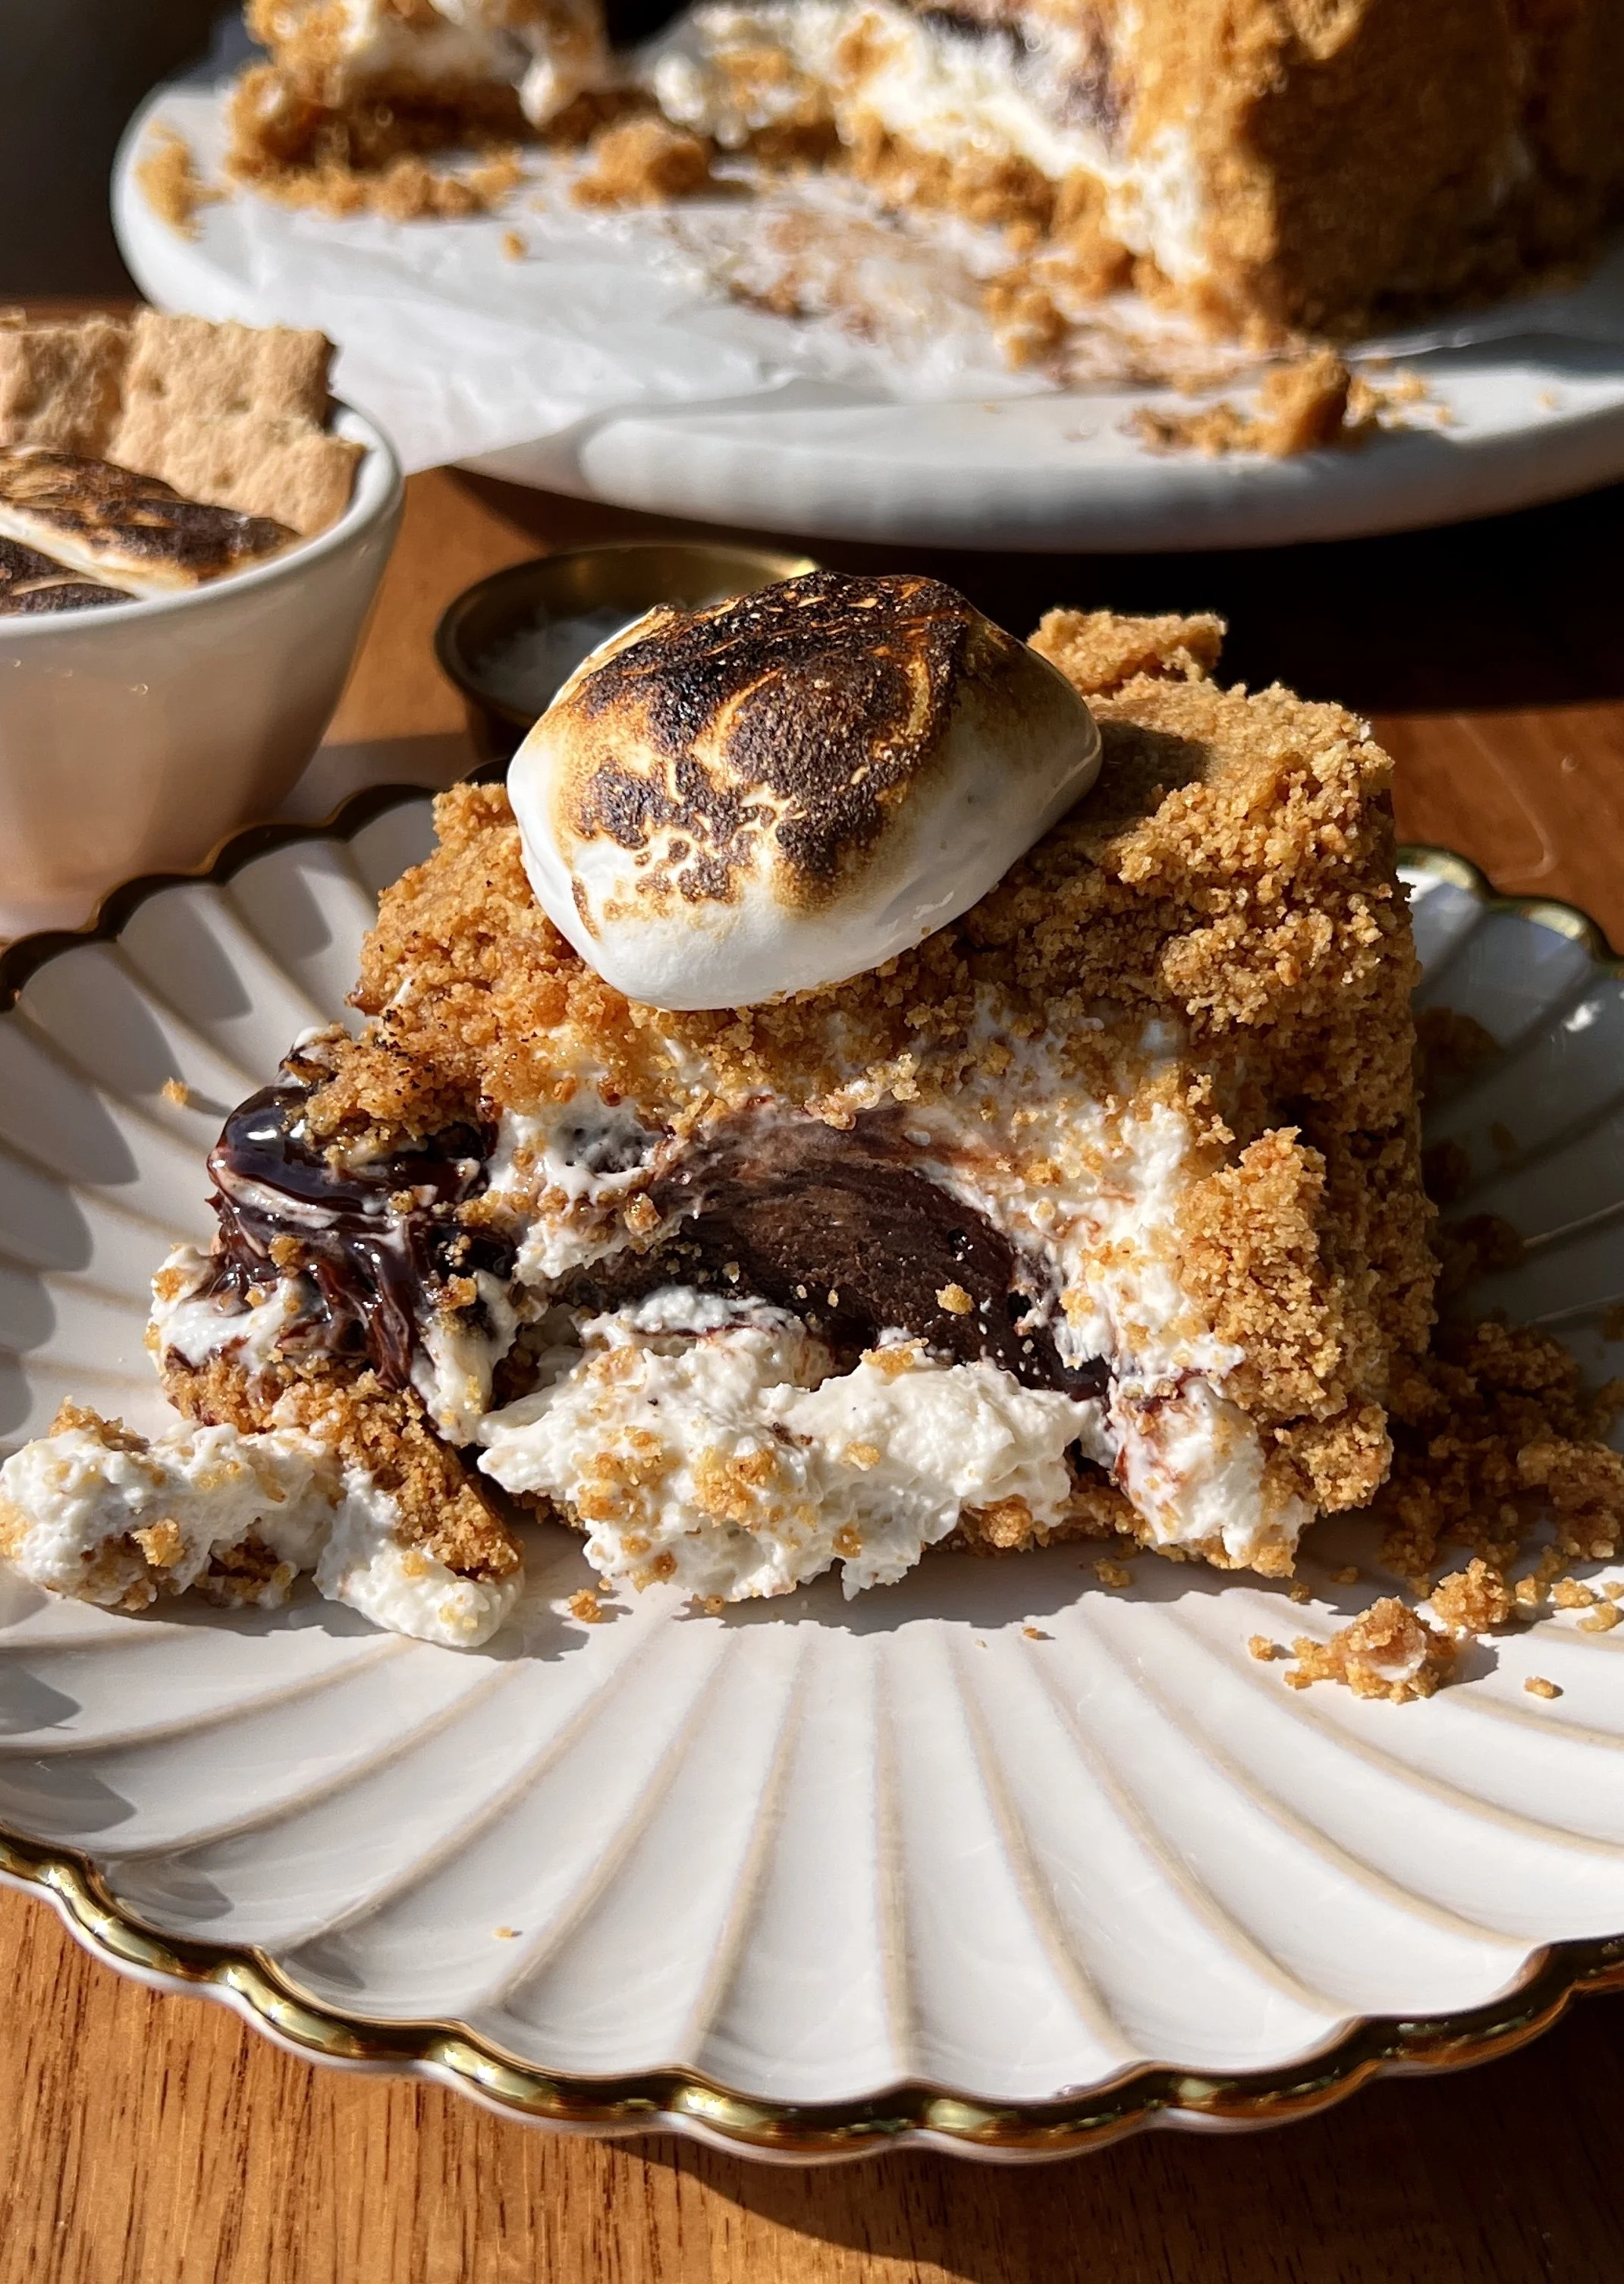
Rich And Creamy Toasted Marshmallow Cheesecake Filling: The rich, creamy, and perfectly tangy toasted marshmallow cheesecake filling is smooth, luscious, and absolutely irresistible with that warm, toasty marshmallow flavor in every single bite.
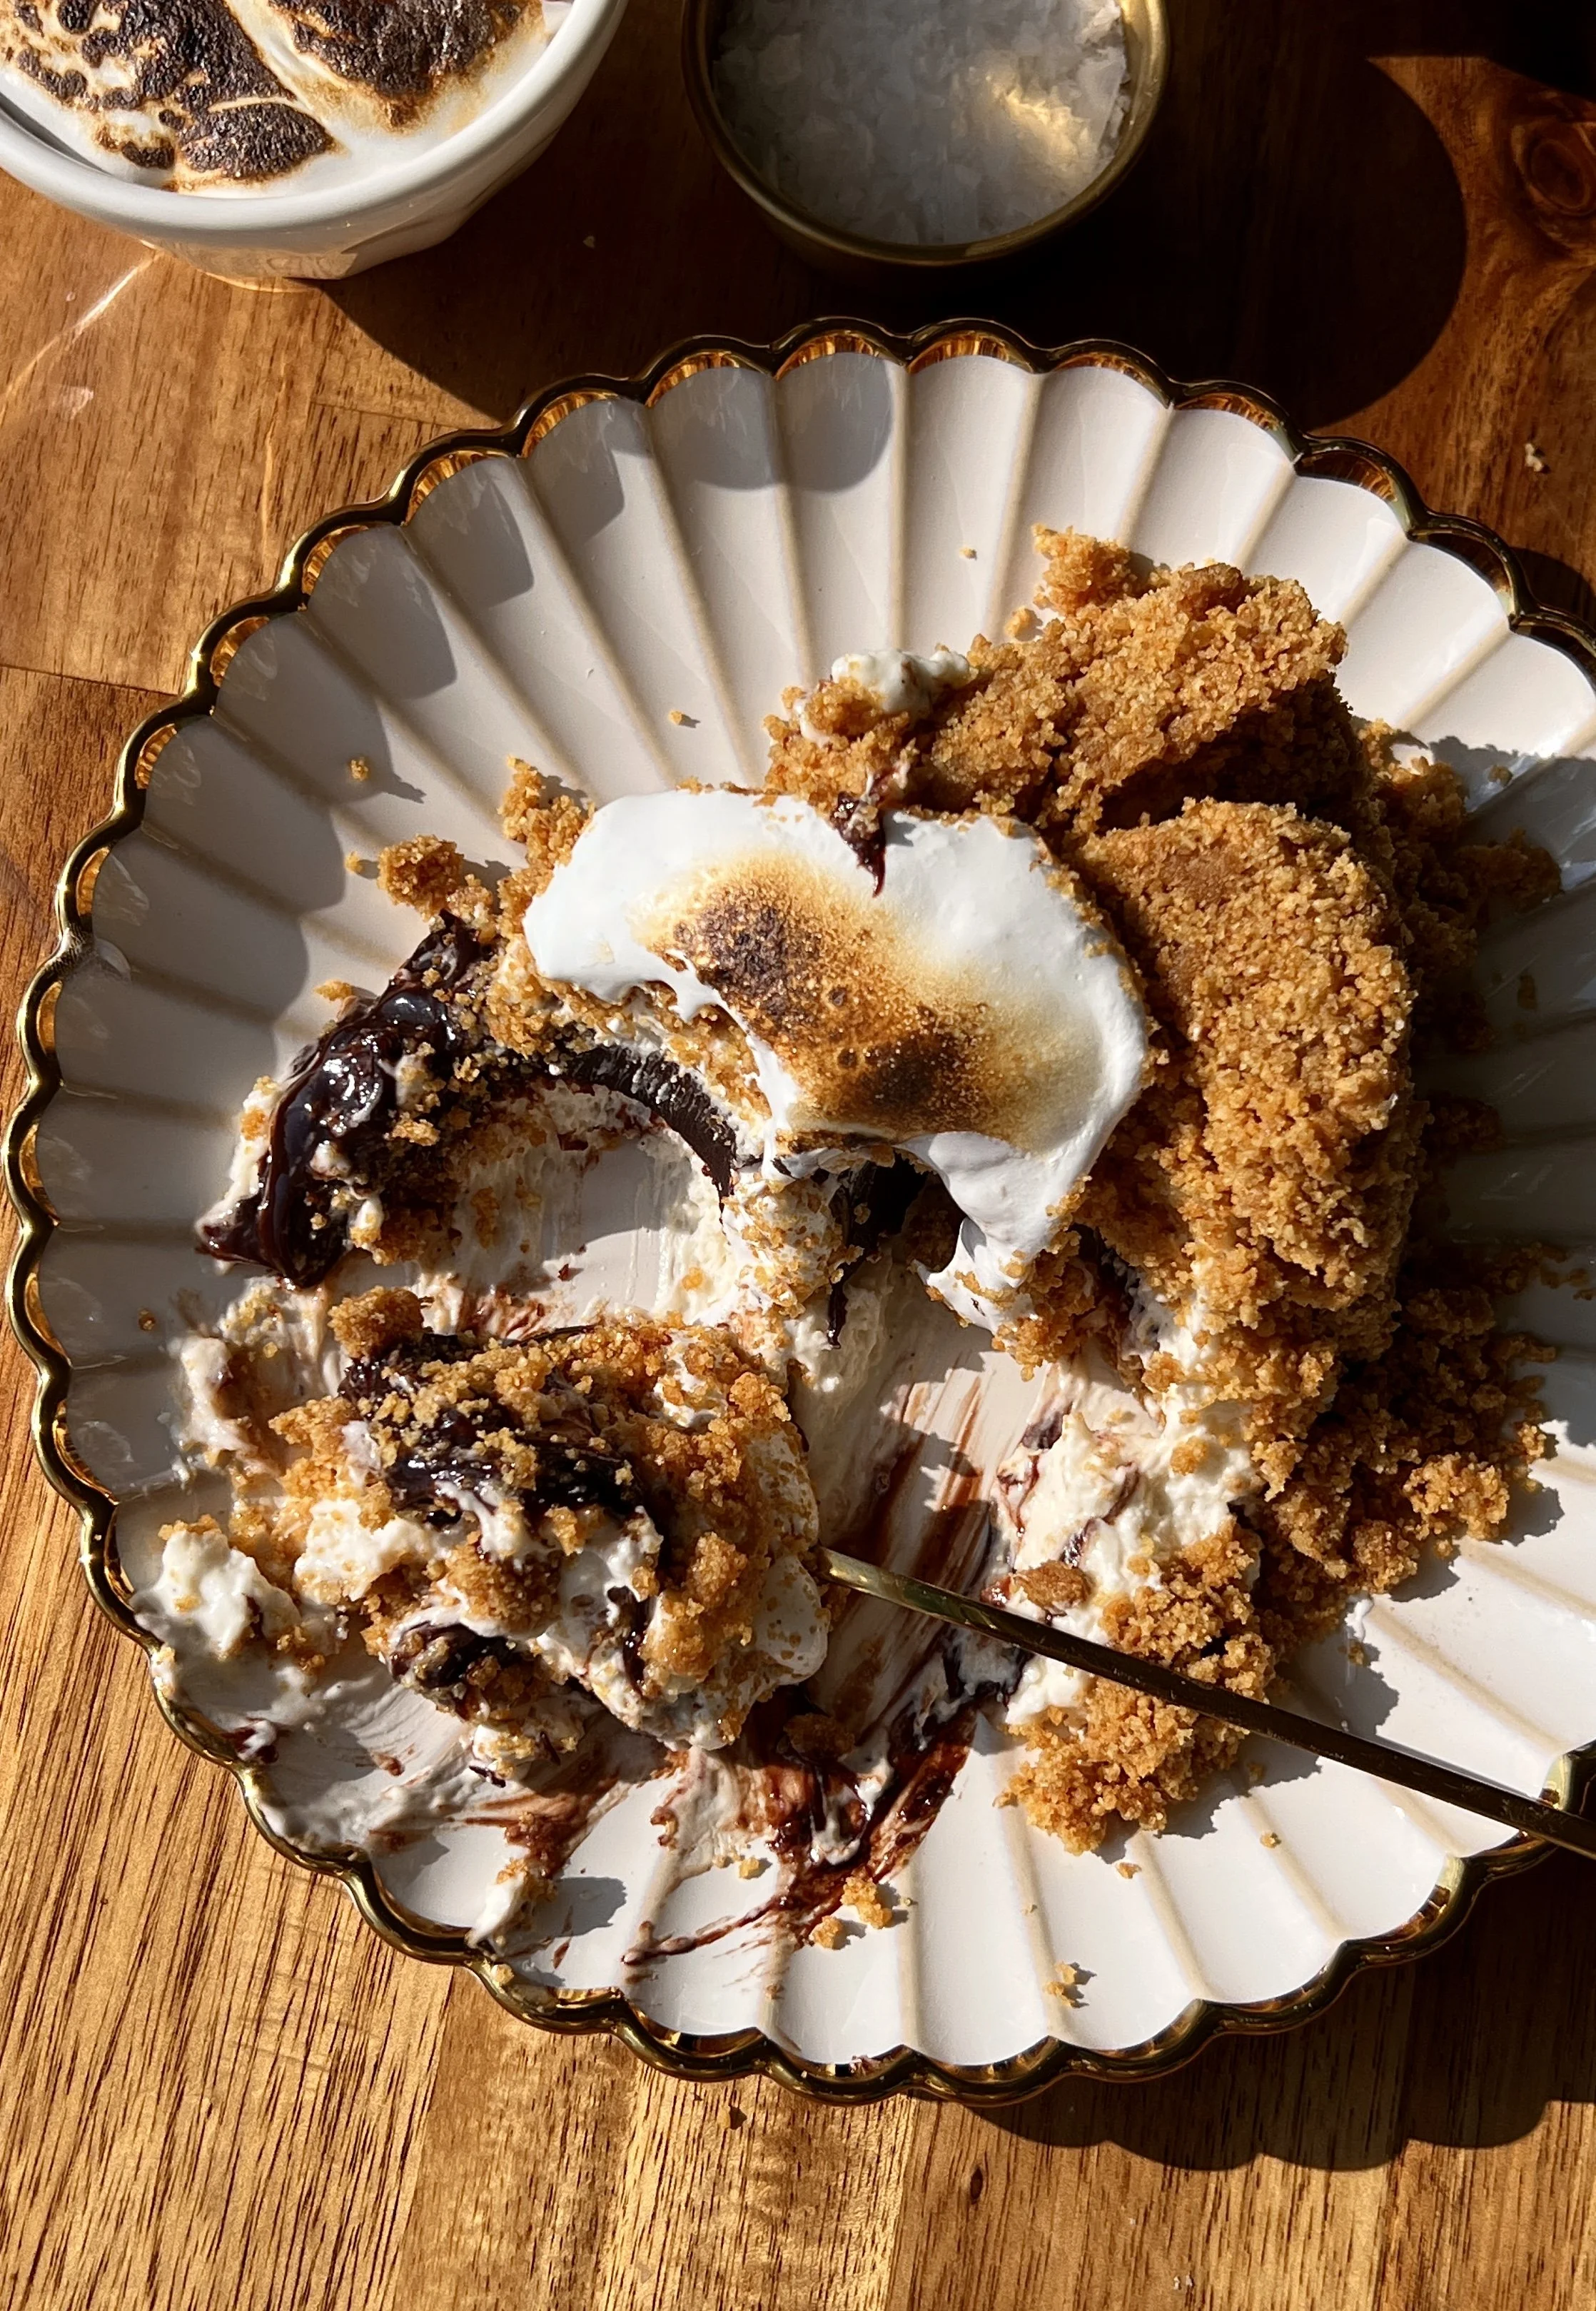
That Thick And Rich Hot Fudge Sauce Layer: A thick and rich hot fudge sauce is layered right in the middle of the cheesecake for the most indulgent, chocolatey, and deeply satisfying surprise that melts into every single bite.
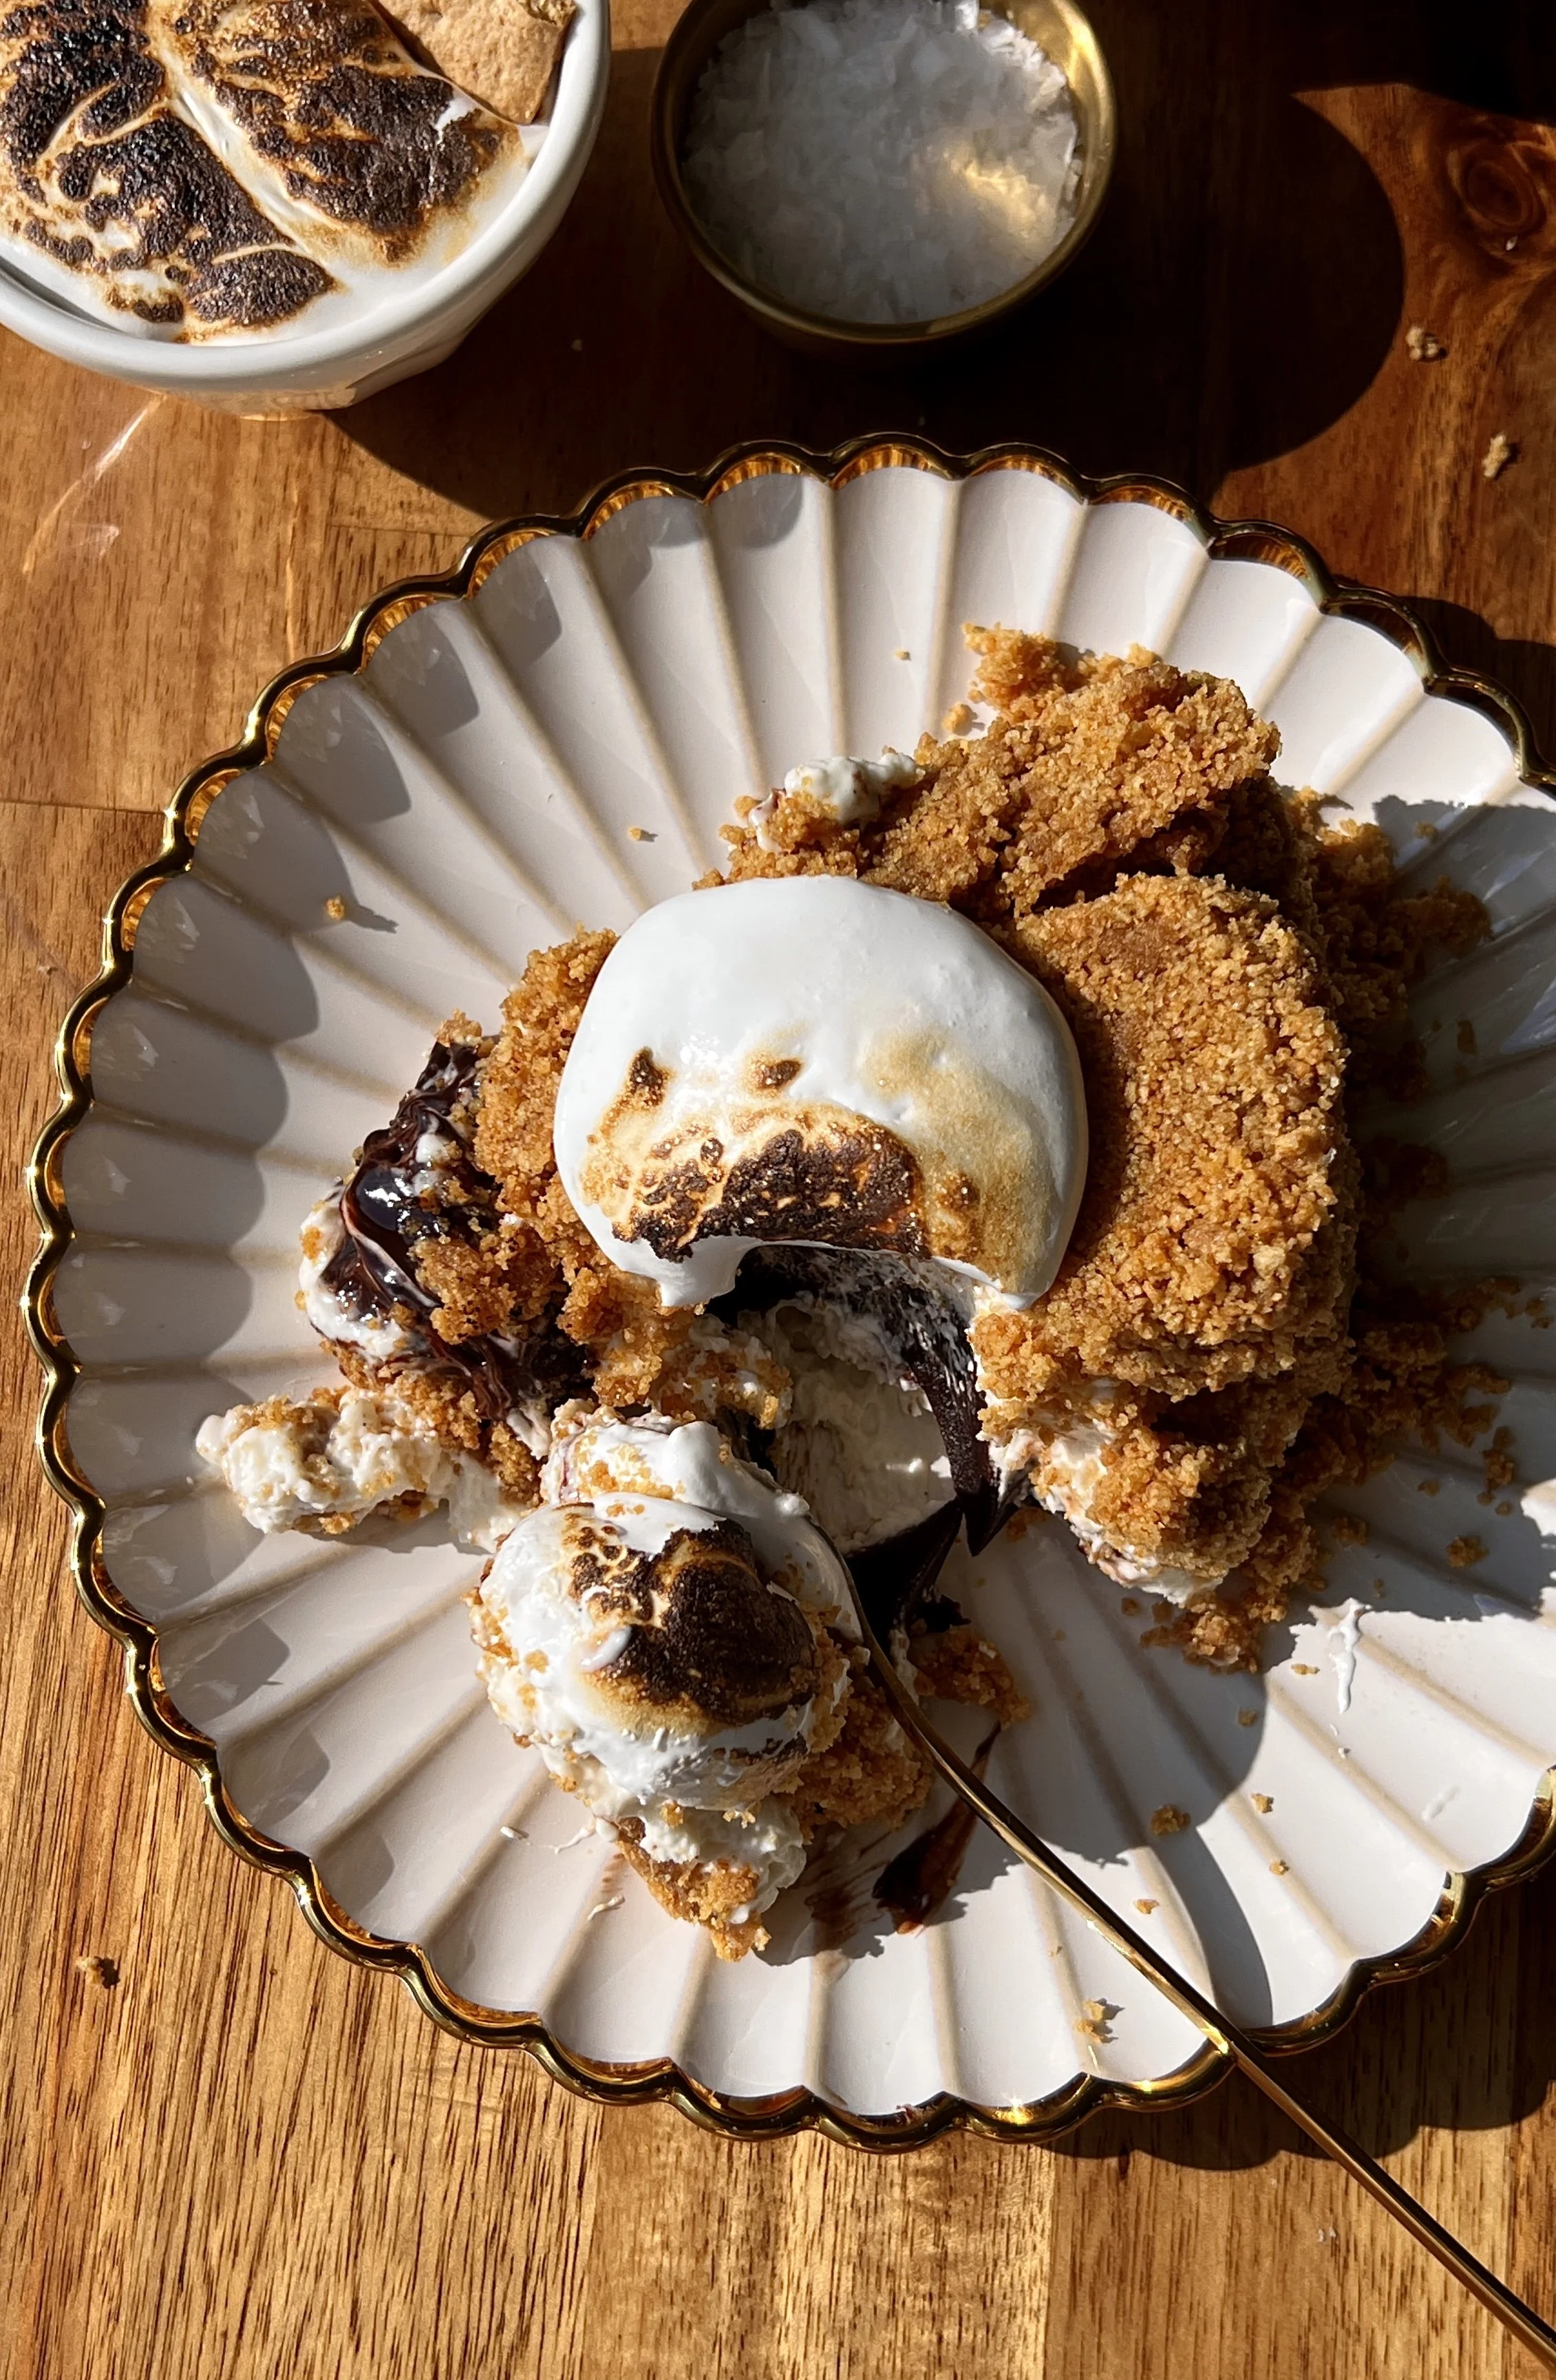
The Most Fun Dessert Experience: Inverting the cheesecake and smashing into the fully crusted graham cracker crust with a spoon is the most fun and interactive dessert experience that everyone at the table will absolutely love.
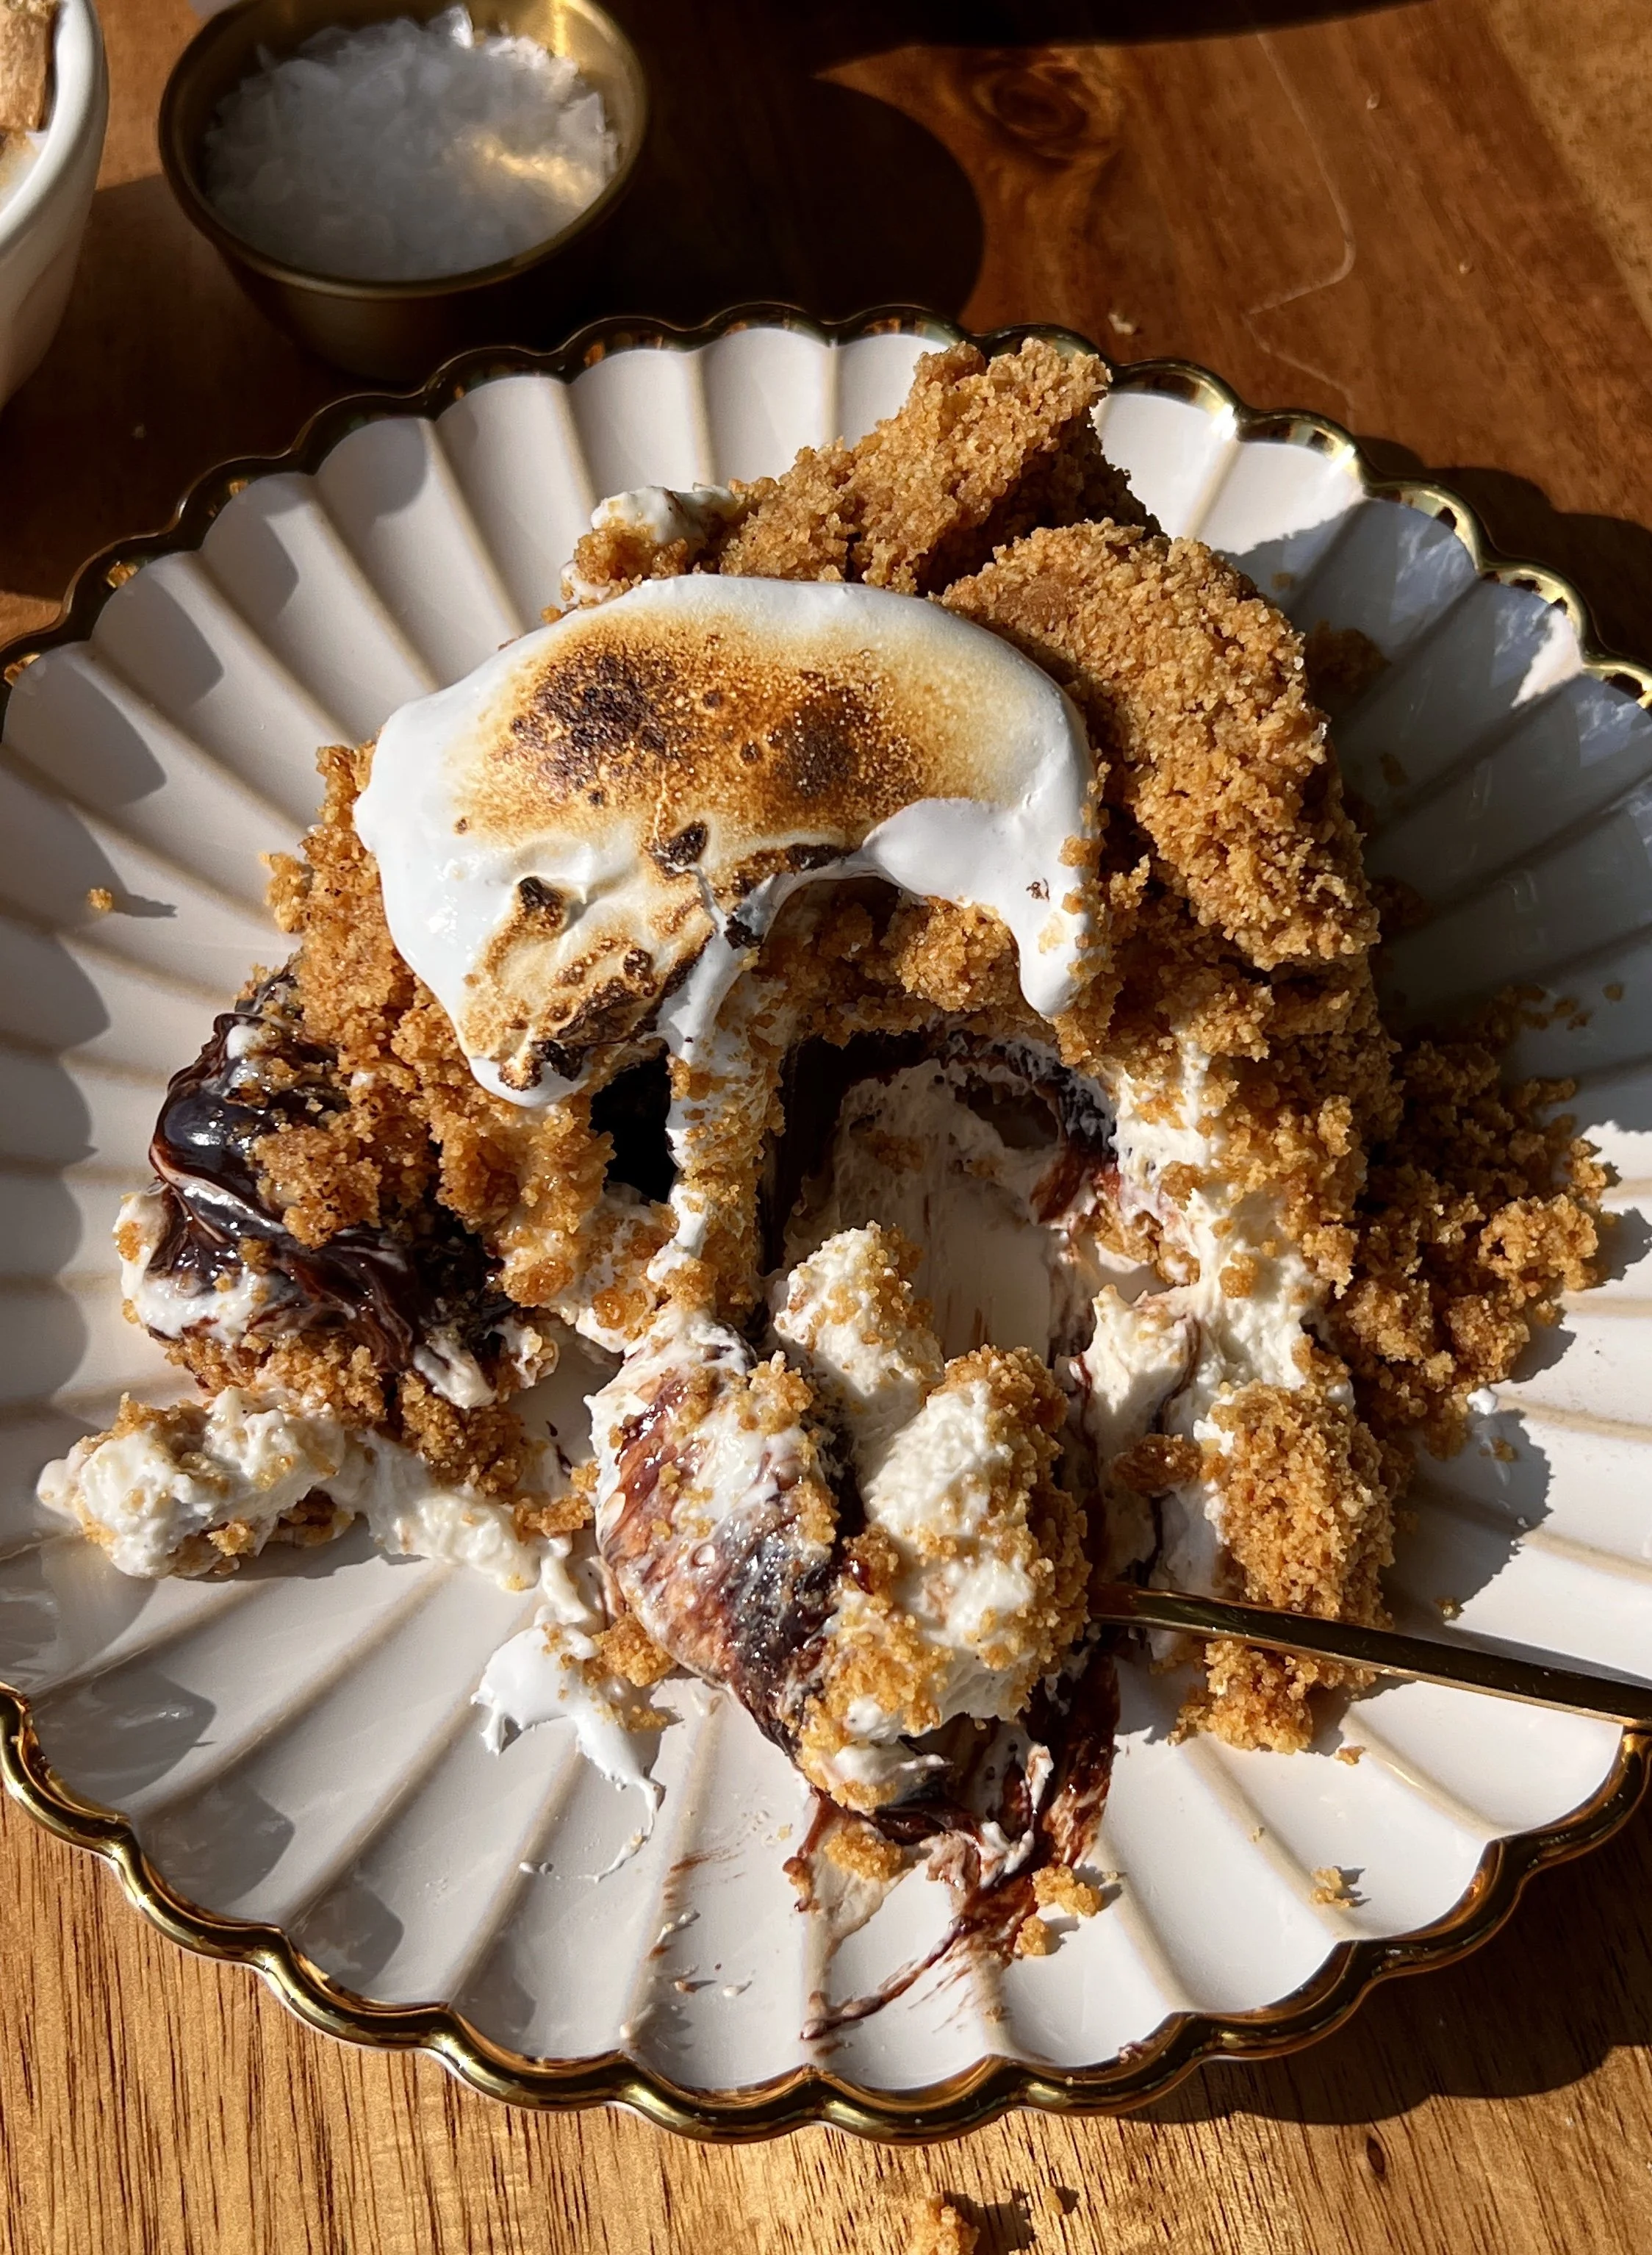
Finished With Toasted Marshmallow Fluff: A generous dollop of toasted marshmallow fluff on top adds the most beautiful, warm, and gooey s'mores finishing touch that takes this cheesecake completely over the top.
No Baking Required: This cheesecake requires absolutely no baking — just a few simple steps, a little patience while it sets in the refrigerator, and you have the most stunning and delicious s'mores dessert ready to serve.
Perfect For Any Occasion: Whether it is a summer gathering, a holiday celebration, a dinner party, or any special occasion, this upside down s'mores cheesecake is always the ultimate showstopper on the dessert table.
Tips for Making a Fully Crusted Upside-Down S’mores Cheesecake (No-Bake):
Make The Bottom Crust Disc First: Start by making the bottom crust disc before anything else so it has plenty of time to freeze and become completely solid — this disc is what fully encloses the cheesecake filling and is the most important step for a clean inversion and a beautifully fully crusted cheesecake.
Freeze The Bottom Crust Disc Separately: After pressing the bottom crust disc into the springform pan and freezing for 15–20 minutes, gently release it from the pan and place it on a plate back in the freezer — keeping it frozen and separate ensures it stays solid and ready to place on top of the assembled cheesecake.
Use A Kitchen Torch Or Room Temperature To Release The Crust Disc: Use a kitchen torch to gently loosen the sides of the frozen crust disc from the springform pan, or let it sit at room temperature for about 10 minutes before releasing — this prevents the disc from cracking when removed.
Make The Hot Fudge Sauce Second: Prepare the hot fudge sauce right after the bottom crust disc goes into the freezer so it has plenty of time to cool completely before adding it to the cheesecake — warm hot fudge sauce will melt the cheesecake filling and affect the texture of the layers.
Cool The Hot Fudge Sauce Completely: Transfer the hot fudge sauce to a separate bowl, cover tightly with plastic wrap to prevent a film from forming, and place it in the refrigerator to speed up the cooling process — it must be completely cooled and thickened before adding it to the well in the cheesecake filling.
Pack The Main Crust In Tightly And All The Way Up The Sides: When pressing the main crust mixture into the springform pan, work slowly and really pack it in tightly and evenly all the way up the sides — a well-packed crust on the bottom and all the way up the sides is what creates that beautiful fully crusted cheesecake that holds together perfectly when inverted.
Freeze The Main Crust Before Filling: Place the springform pan with the main crust into the freezer for at least 15–20 minutes before adding the cheesecake filling — this helps the crust set up firmly so it holds its shape when the filling is added on top.
Use Cold Heavy Cream: Make sure the heavy cream is very cold before beating — cold cream whips up much faster and holds its shape better for a light, fluffy, and perfectly stable cheesecake filling.
Beat The Heavy Cream To Stiff Peaks: Beat the heavy cream until stiff peaks form before folding into the cheesecake filling — this is what gives the no-bake cheesecake its light, airy, and perfectly set texture throughout.
Use Room Temperature Cream Cheese: Make sure the cream cheese is fully at room temperature before beating — cold cream cheese will result in a lumpy filling that is difficult to smooth out.
Toast The Marshmallow Fluff Before Adding: Toast the marshmallow fluff with a kitchen torch or under the broiler before folding into the cheesecake filling — this adds a warm, smoky, and deeply irresistible toasted marshmallow flavor that makes this cheesecake truly unique and absolutely incredible.
Fold The Whipped Cream In Gently: Use a spatula to slowly and gently fold the whipped cream into the cheesecake filling — folding too aggressively will deflate the whipped cream and result in a denser, less airy cheesecake filling throughout.
Create A Deep Well For The Hot Fudge Sauce: When adding the first two thirds of the cheesecake filling, push it out and up the sides of the pan to create a deep well in the center — this well needs to be deep enough to hold all of the hot fudge sauce without it overflowing into the cheesecake filling.
Fill The Cheesecake To The Top Of The Rim: Make sure the final layer of cheesecake filling reaches the very top of the rim of the pan before placing the frozen crust disc on top — this ensures the cheesecake is perfectly level and the crust disc sits flush for the most beautiful fully crusted result.
Place The Frozen Crust Disc On Top Last: Place the frozen bottom crust disc on top of the filled cheesecake to fully enclose all of the filling — refer to the video for guidance on how to position it correctly for the most secure and beautiful fully crusted cheesecake.
Refrigerate Overnight For The Best Results: While a minimum of 6 hours is required, refrigerating the cheesecake overnight gives the best texture, the cleanest inversion, and the most beautiful fully crusted presentation when served.
Invert Quickly And Confidently: When inverting the cheesecake, place the serving plate upside down on top of the pan and flip it quickly and confidently in one smooth motion — hesitating can cause the cheesecake to shift or not release cleanly.
Toast The Marshmallow Fluff Right Before Serving: Add a dollop of marshmallow fluff on top of the inverted cheesecake and use a kitchen torch to toast it right before serving — this creates the most beautiful, warm, and gooey s'mores finishing touch that makes every single bite completely irresistible.
How to Store a Fully Crusted Upside-Down S’mores Cheesecake (No-Bake):
Best Served Fresh: This upside down s'mores cheesecake is at its absolute best served fresh the day it is inverted and smashed for the most fun, interactive, and impressive dessert experience with the toasted marshmallow fluff on top.
Make Ahead: This cheesecake is a wonderful make-ahead dessert — assemble it the night before, cover tightly with plastic wrap or foil, and refrigerate overnight. Invert, smash, and top with toasted marshmallow fluff right before serving for the best presentation and texture.
Make Ahead (Hot Fudge Sauce): The hot fudge sauce can be made up to 1 week in advance and stored in an airtight jar or container in the refrigerator. Gently reheat before using to bring it back to a smooth, pourable consistency before adding to the cheesecake.
Make Ahead (Bottom Crust Disc): The frozen bottom crust disc can be made up to 2 days in advance and stored in the freezer until ready to assemble — this is a great way to save time and make the assembly process smoother and more efficient.
Refrigerator: Store leftover cheesecake covered or in an airtight container in the refrigerator for up to 4 days. The crust will soften slightly as it sits but the flavors will remain delicious and the cheesecake will still be incredibly creamy and indulgent throughout.
Freezer: Freeze individual portions of the assembled but uninverted cheesecake in a freezer-safe container for up to 2 months. Thaw overnight in the refrigerator before inverting and serving for the best texture and presentation.
To Serve From Cold: Let refrigerated portions sit at room temperature for 10–15 minutes before serving for the best creamy texture and most delicious flavor throughout every single bite.
FAQs:
Q: Can I make this upside down s'mores cheesecake ahead of time?
A: Yes. This cheesecake is a wonderful make-ahead dessert — assemble it the night before, cover tightly with plastic wrap or foil, and refrigerate overnight. Invert, smash, and top with toasted marshmallow fluff right before serving for the best presentation and texture.
Q: Can I make the hot fudge sauce ahead of time?
A: Yes. The hot fudge sauce can be made up to 1 week in advance and stored in an airtight jar or container in the refrigerator. Gently reheat and allow to cool completely before adding to the cheesecake filling.
Q: Can I use store-bought hot fudge sauce instead of homemade?
A: Yes. Store-bought hot fudge sauce works perfectly as a substitute if you are short on time — just make sure it is completely cooled and thickened before adding it to the well in the cheesecake filling.
Q: Can I substitute the graham crackers for the crust?
A: Yes. Biscoff cookies work beautifully as a substitute for the graham crackers in the crust and add a warm, caramelized, and slightly spiced flavor that pairs wonderfully with the s'mores flavors throughout.
Q: Can I use marshmallows instead of marshmallow fluff?
A: Yes. 20–22 standard marshmallows work as a substitute for the marshmallow fluff — melt them in the microwave first and then toast before folding into the cheesecake filling. Marshmallow fluff is recommended as it is easier to work with and creates a smoother, more consistent cheesecake filling.
Q: Why do I need to make the bottom crust disc separately?
A: The bottom crust disc is what fully encloses the cheesecake filling and creates that beautiful fully crusted cheesecake — making it separately and keeping it frozen ensures it stays solid and is easy to place on top of the assembled cheesecake without cracking or breaking.
Q: Why do I need to freeze the crust before filling?
A: Freezing the crust for at least 15–20 minutes helps it set up firmly so it holds its shape when the cheesecake filling is added on top — this is especially important for a clean and beautiful inversion and a perfectly fully crusted cheesecake when serving.
Q: How long does the cheesecake need to set in the refrigerator?
A: A minimum of 6 hours is required for the cheesecake to set properly, but refrigerating overnight is strongly recommended for the best texture, the cleanest inversion, and the most beautiful fully crusted presentation when served.
Q: What is the best way to invert the cheesecake?
A: Place a round serving plate upside down on top of the springform pan and flip it quickly and confidently in one smooth motion. Release the springform pan gently and slowly for the cleanest release and the most beautiful fully crusted presentation.
Q: How do I toast the marshmallow fluff for the topping?
A: Place a dollop of marshmallow fluff on top of the inverted cheesecake and use a kitchen torch to toast it to a beautiful golden brown right before serving — alternatively, spread the fluff on a parchment-lined baking sheet and place it under the broiler for a few minutes, keeping a very close eye on it as it can burn quickly.
Q: Can I freeze this cheesecake?
A: Yes. Freeze individual portions of the assembled but un-inverted cheesecake in a freezer-safe container for up to 2 months. Thaw overnight in the refrigerator before inverting and serving for the best texture and presentation.
Love these? Check out my other cheesecake recipes:
Make sure to tag me @wellmadebykiley on Instagram and leave a review or comment if you make this fully crusted upside-down s’mores cheesecake (no-bake)!